Developer Portal with Kubesphere
kubesphere (https://github.com/kubesphere/kubesphere) 의 오픈소스 프로젝트로 쿠버네티스 클러스터에서 사용할 수 있는 웹 UI를 제공합니다. 워크스페이스/프로젝트 단위로 워크로드를 관리하고, Jenkins를 통한 파이프라인도 제공한다. 내부적으로 프로메테우스와 ElasticSearch 를 통한 모니터링/로깅을 제공한다. OpenPitrix 를 사용한 App Store도 제공한다.
공식 사이트: https://kubesphere.io
Environments
- PKS(Pivotal Container Service) 1.6.1
- NSX-T 2.4.3
- vSphere 6.7U3
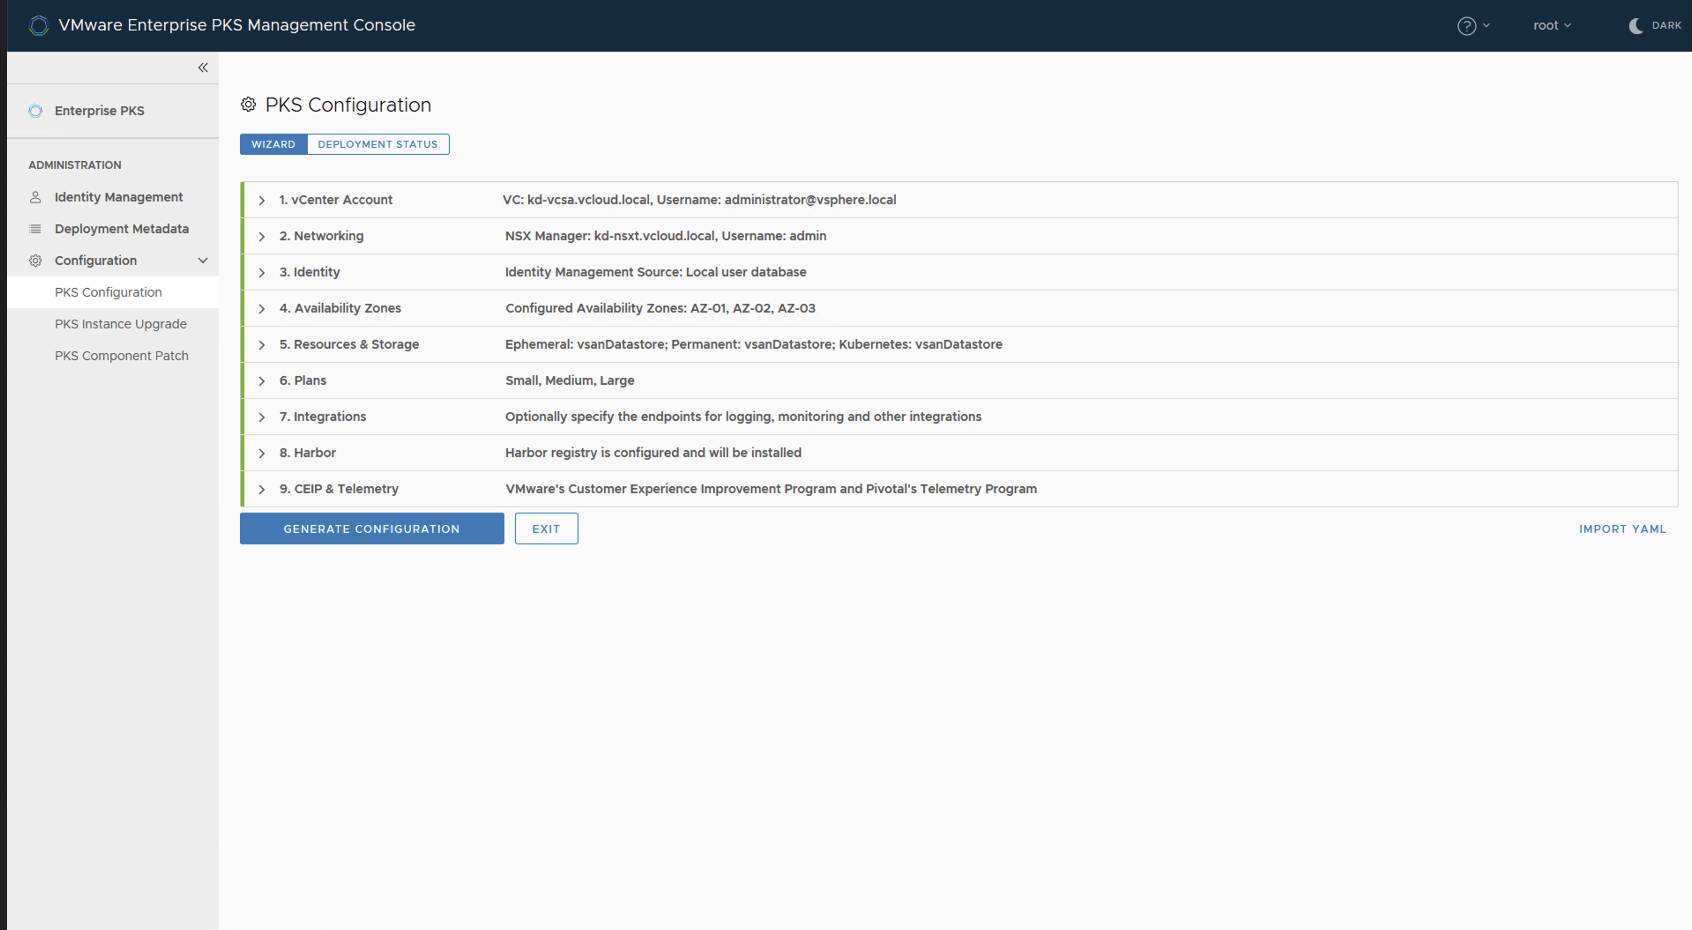
PKS Installation with EPMC(Enterprise PKS Management Console)
- Deploye PKS Management Console
- Configuration
- Deploy
Create K8s Cluster
클러스터 생성
pks create-cluster k8s --external-hostname demo-cluster.k8s.kdis.local -p medium -n 5
클러스터 생성 확인
pks cluster k8s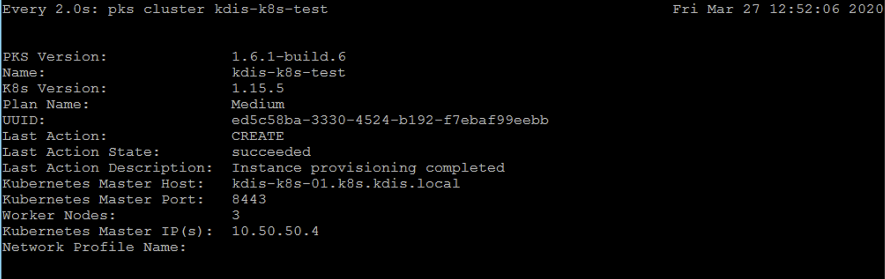
- bosh cli로 생성된 K8s 클러스터 VM 확인

- bosh cli로 생성된 K8s 클러스터 VM 확인
DNS Setting for K8s Master API LB 생성된 클러스터의 Master API Server의 IP 주소를 DNS에 클러스터 생성 시 입력한 external-hostname으로 등록한다.

EPMC : Enterprise PKS
- summay
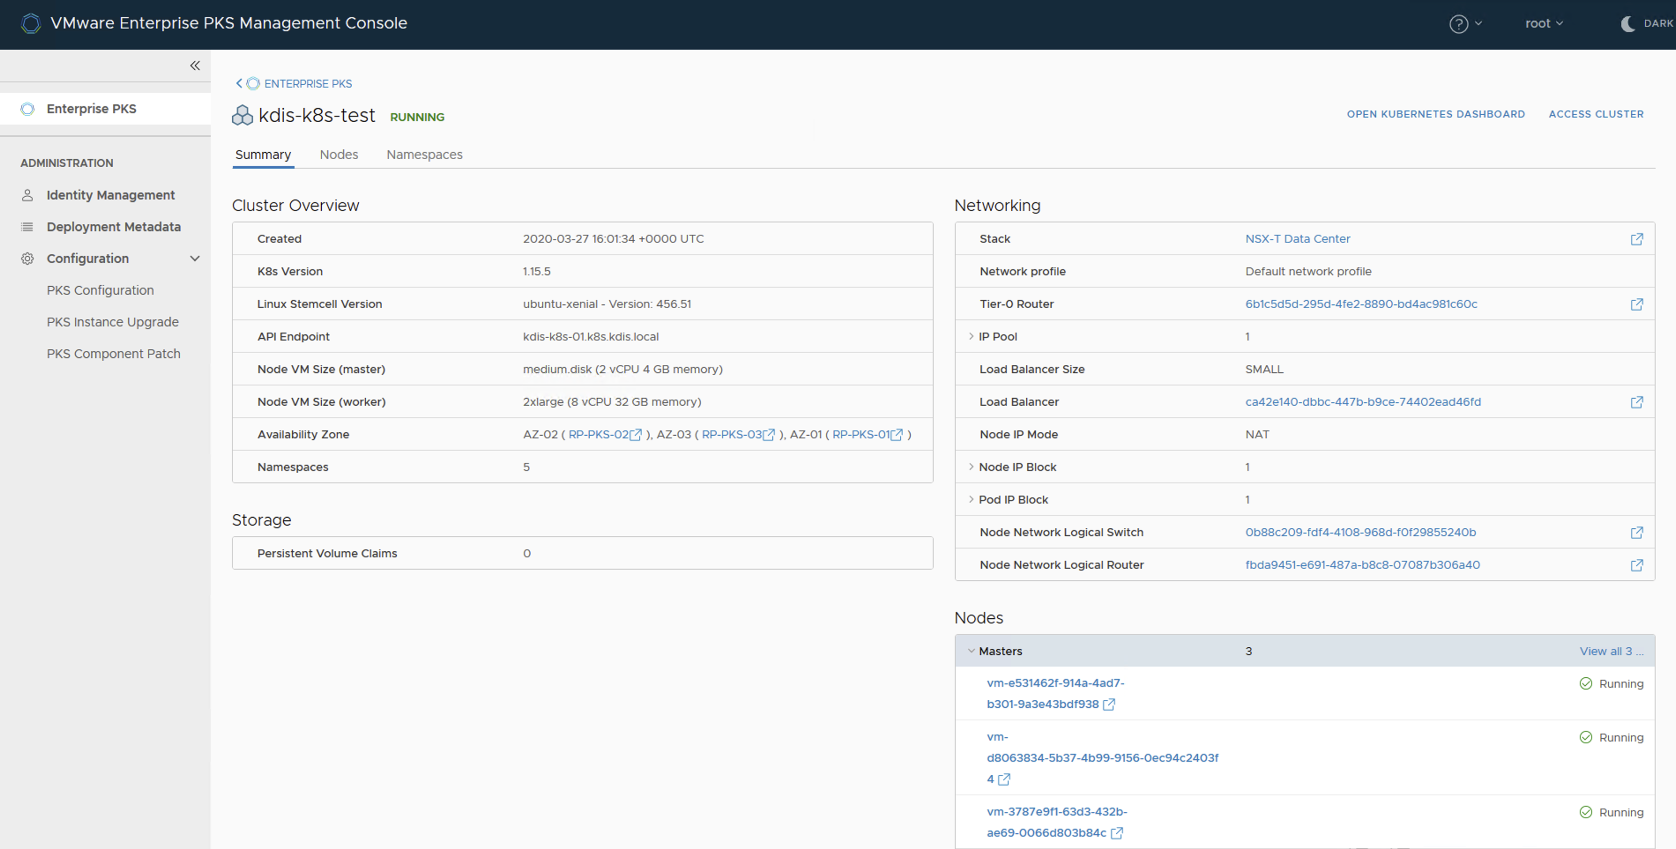
- ndoes
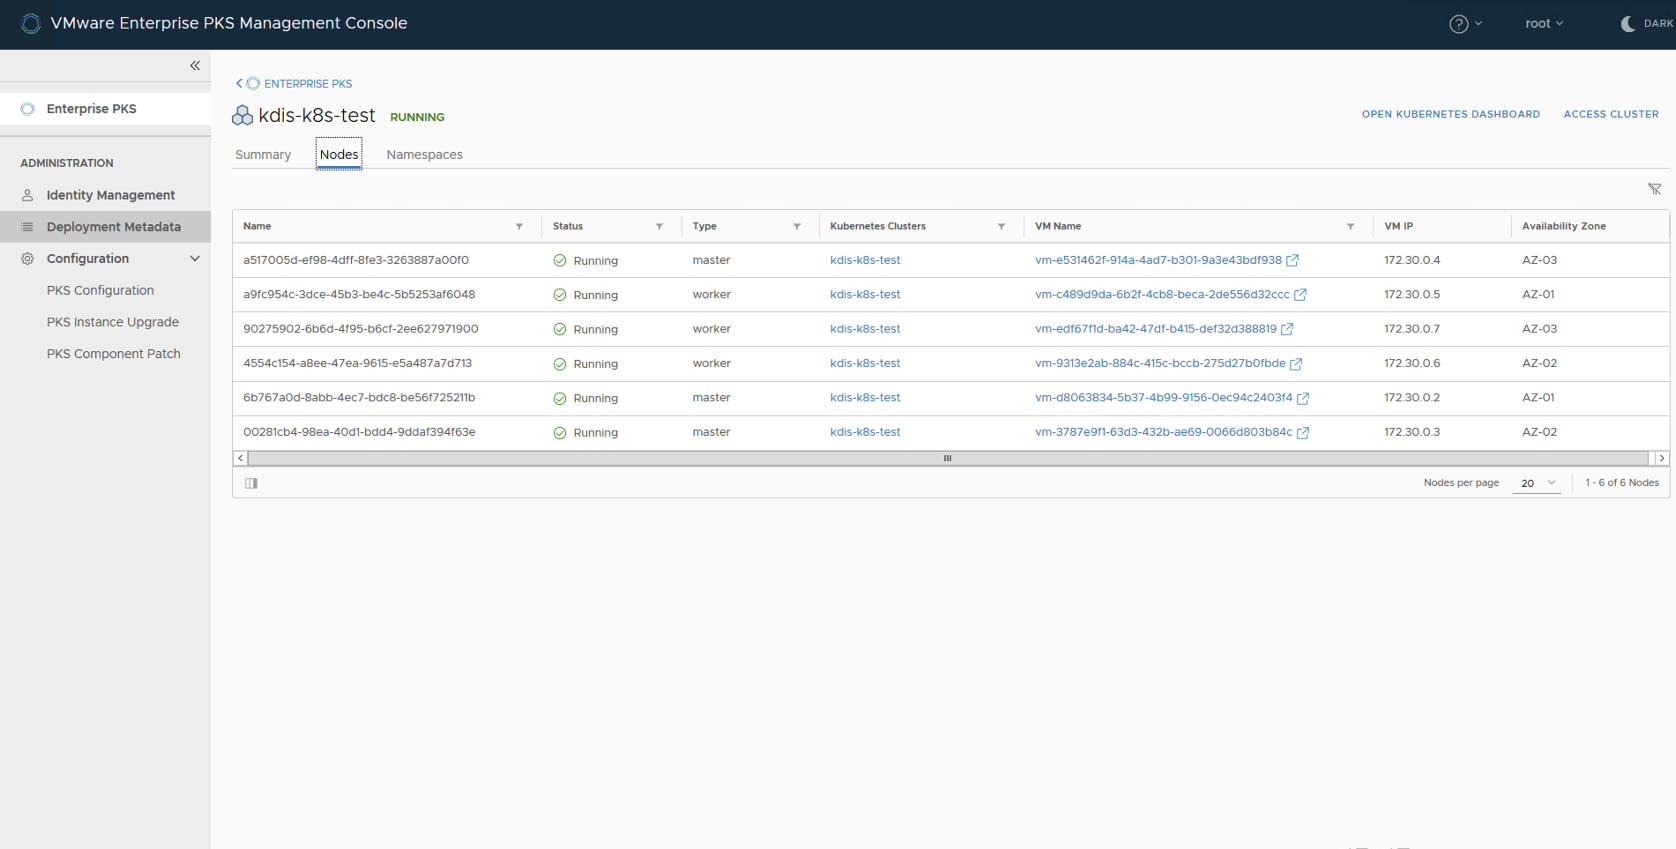
- namespaces
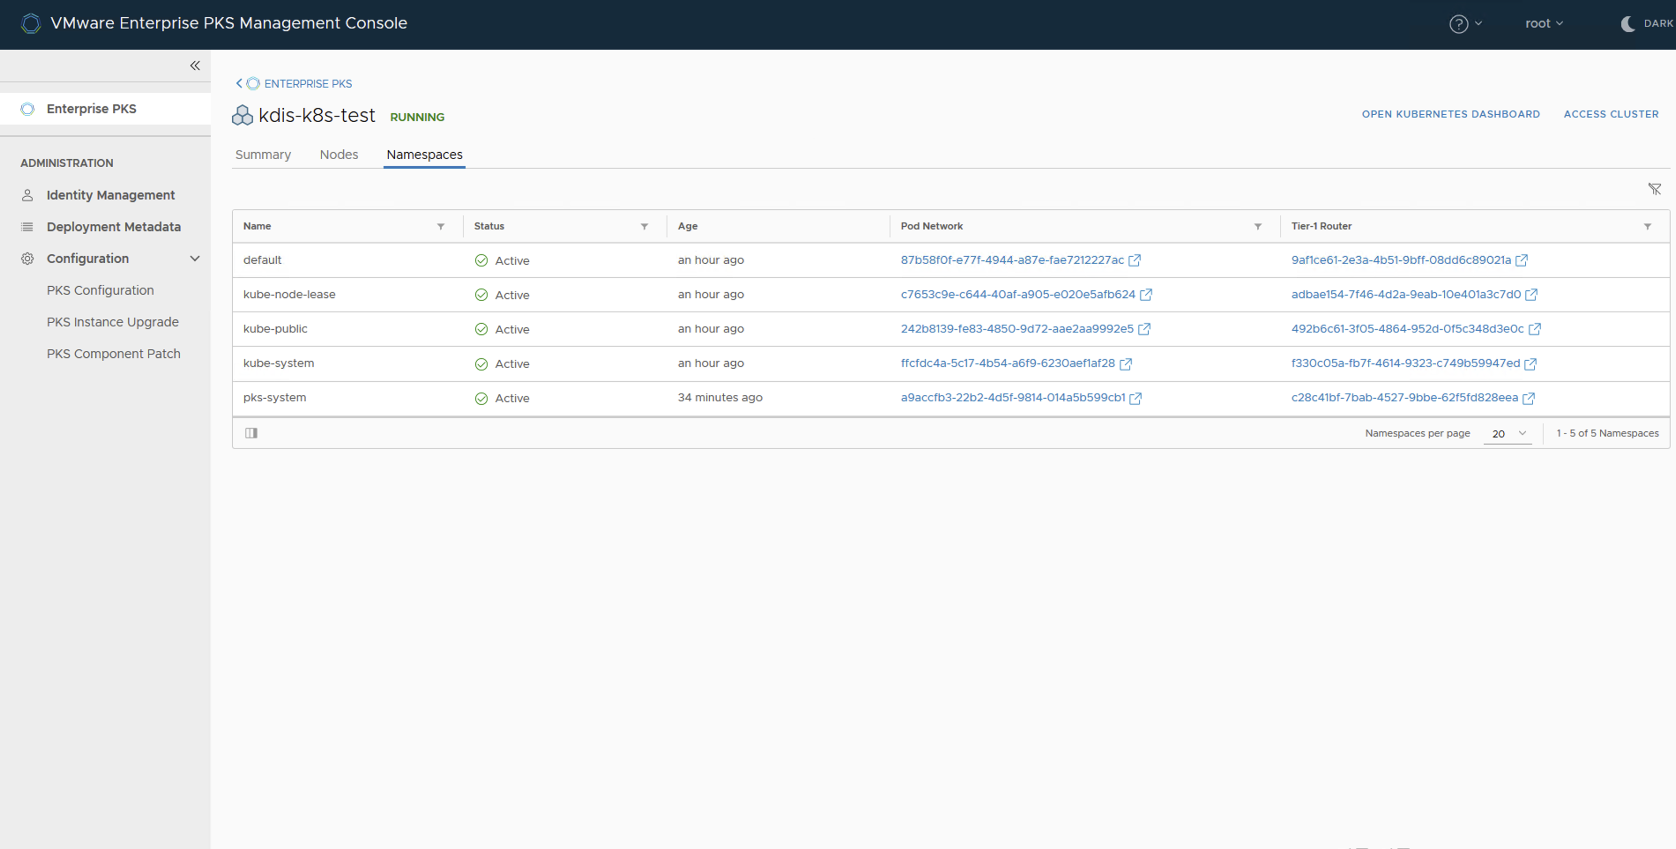
- summay
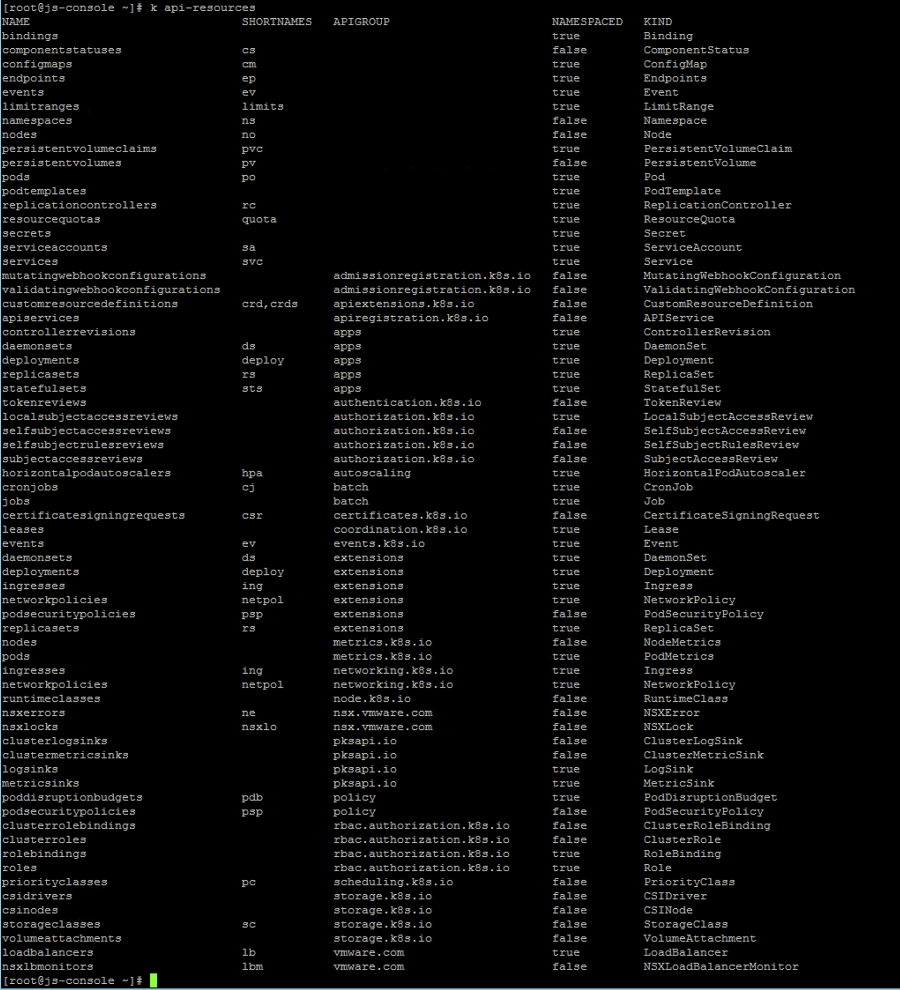
Get Kubernetes Credentials for Kubectl cli
pks get-credentials k8s- kubectl cli 확인
kubectl cluster-info
kubectl api-resources
Software
- Helm
- Kubesphere
Default Storage Class 생성
- Storage Class 생성
kubectl create -f -<<-EOF
kind: StorageClass
apiVersion: storage.k8s.io/v1
metadata:
  name:  thick
provisioner: kubernetes.io/vsphere-volume
parameters:
  diskformat: zeroedthick
EOF

kubectl patch storageclass thick -p '{"metadata": {"annotations":{"storageclass.kubernetes.io/is-default-class":"true"}}}'
Helm
Download CLI
wget https://get.helm.sh/helm-v2.16.3-linux-amd64.tar.gztiller 서비스 어카운트/클러스터롤 생성
kubectl apply -f -«-EOF apiVersion: v1 kind: ServiceAccount metadata: name: tiller namespace: kube-system
apiVersion: rbac.authorization.k8s.io/v1beta1 kind: ClusterRoleBinding metadata: name: tiller roleRef: apiGroup: rbac.authorization.k8s.io kind: ClusterRole name: cluster-admin subjects:
kind: ServiceAccount name: tiller namespace: kube-system EOF
helm init
helm init --service-account=tillerhelm 에서 사용할 repo 추가 및 업데이트하기
helm repo add stable https://kubernetes-charts.storage.googleapis.com
helm repo add incubator https://kubernetes-charts-incubator.storage.googleapis.com/
helm repo add bitnami https://charts.bitnami.com/bitnami

helm repo update
kubesphere
Installing
kubectl apply -f https://raw.githubusercontent.com/kubesphere/ks-installer/master/kubesphere-complete-setup.yamlVerify
kubectl logs -n kubesphere-system $(kubectl get pod -n kubesphere-system -l app=ks-install -o jsonpath='{.items[0].metadata.name}') -f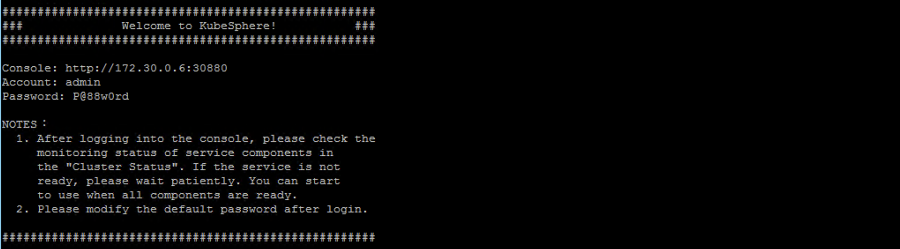
Browsing kubesphere web ui
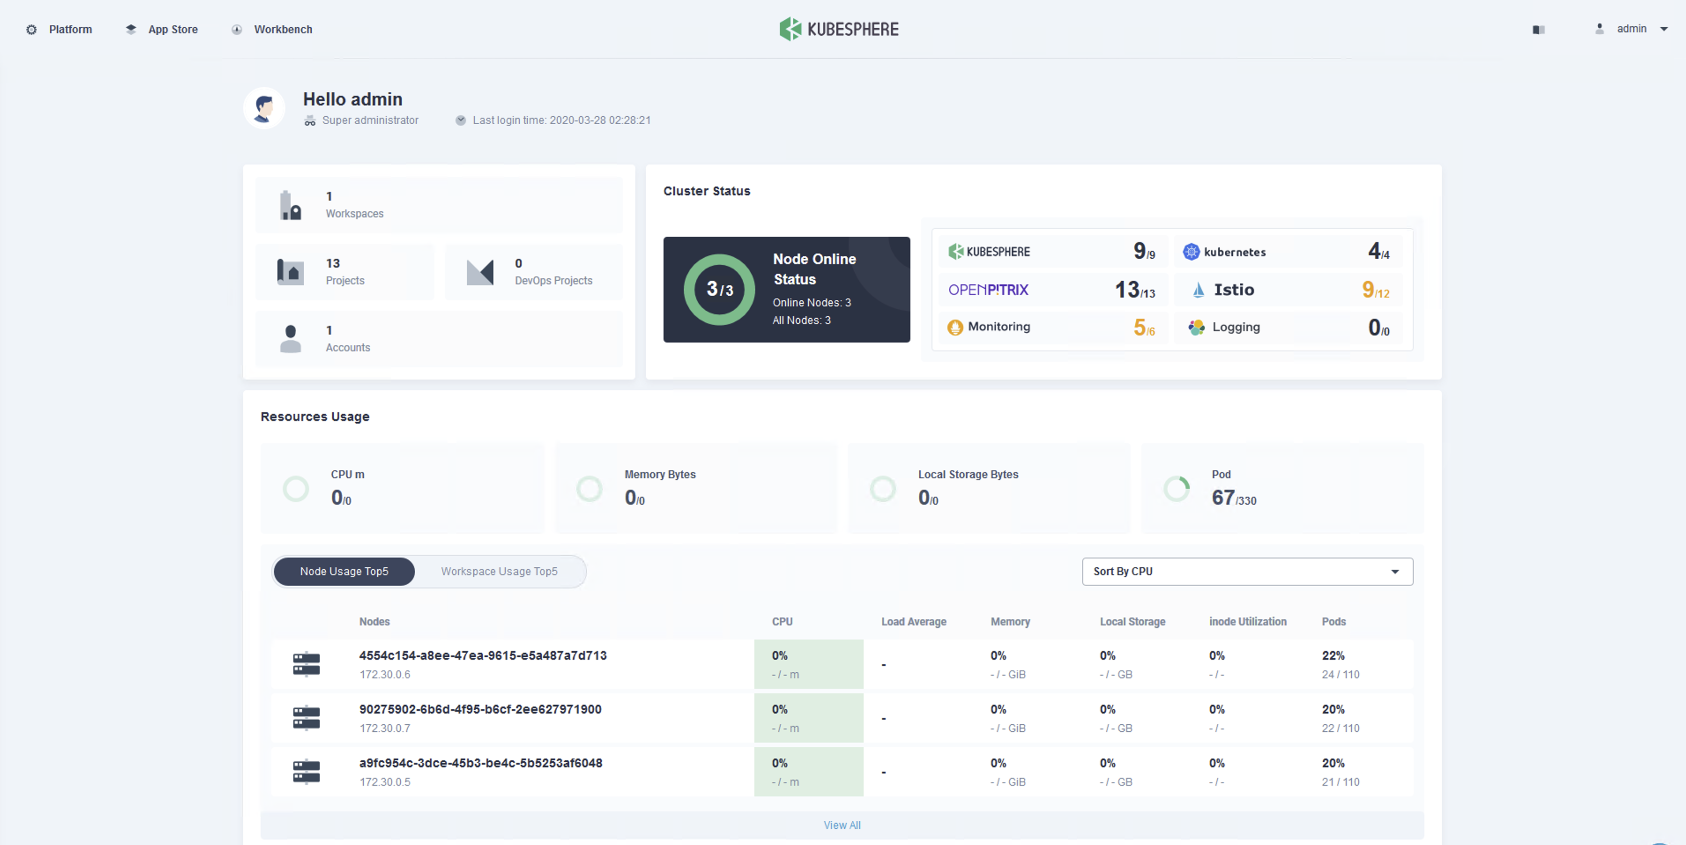
Logging 부분의 Elastic Search가 설치되어 있지 않고, Istio 와 Monitoring 에서 실행되지 않고 에러가 나는 부분이 있다. ks-installer 컨피그맵을 수정하여 추가적으로 설치한다.
kubectl edit cm ks-installer -n kubepshere-system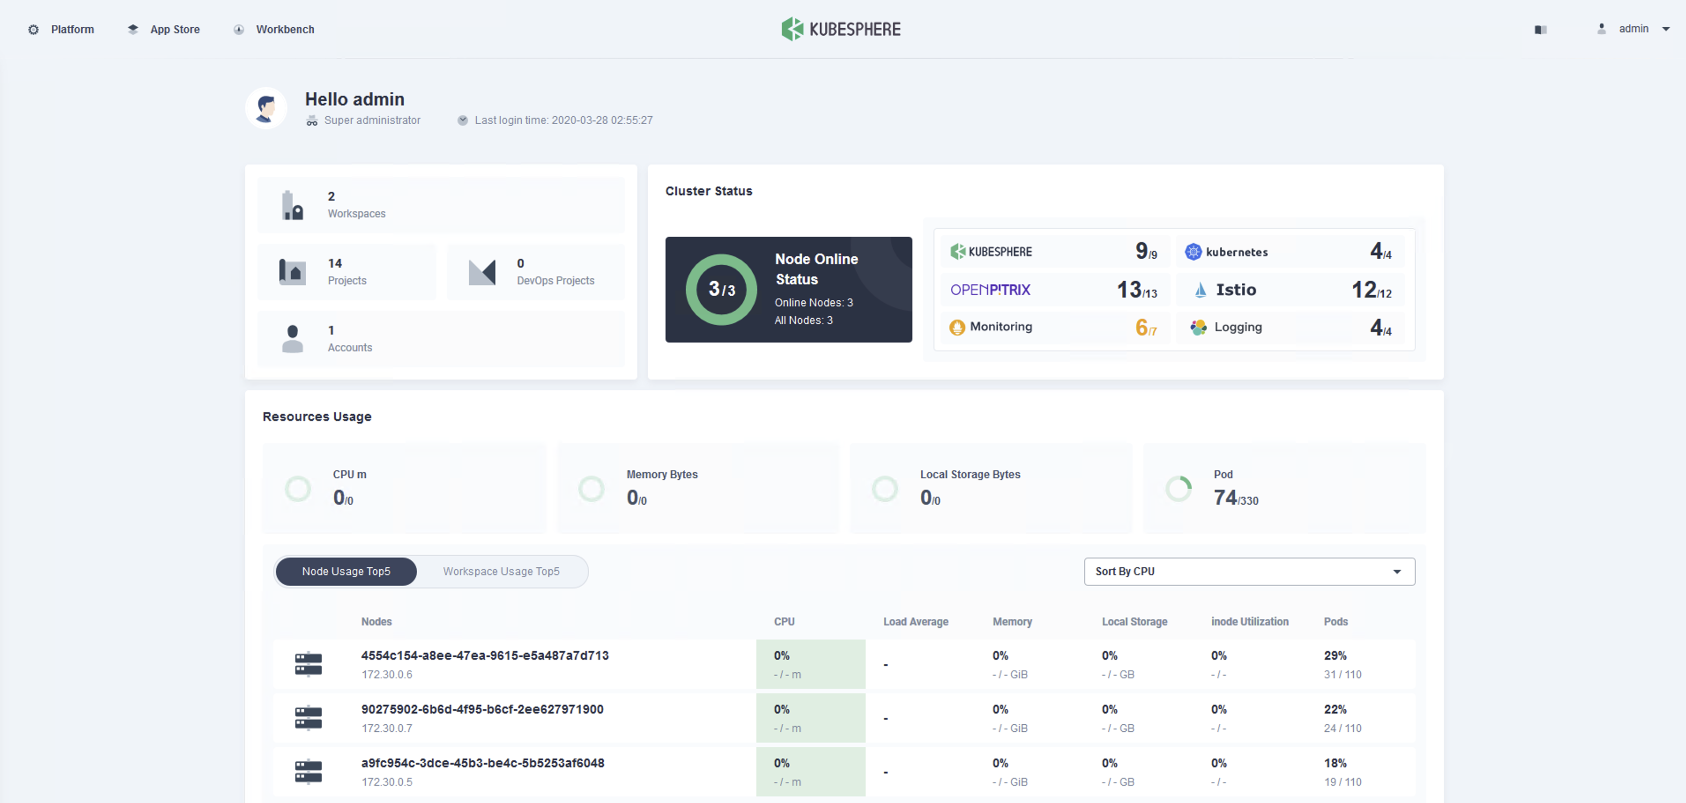
** node exporter 에 오류가 있는것은 나중에 확인 필요하다 **
Prometheus Node-Exporter 가 제대로 실행되지 않음
“linux mounts: Path / is mounted on / but it is not a shared or slave mount.” 오류 발생
daemonset 에서 / Volume 을 삭제하고 다시 기동하면 정상적으로 기동함
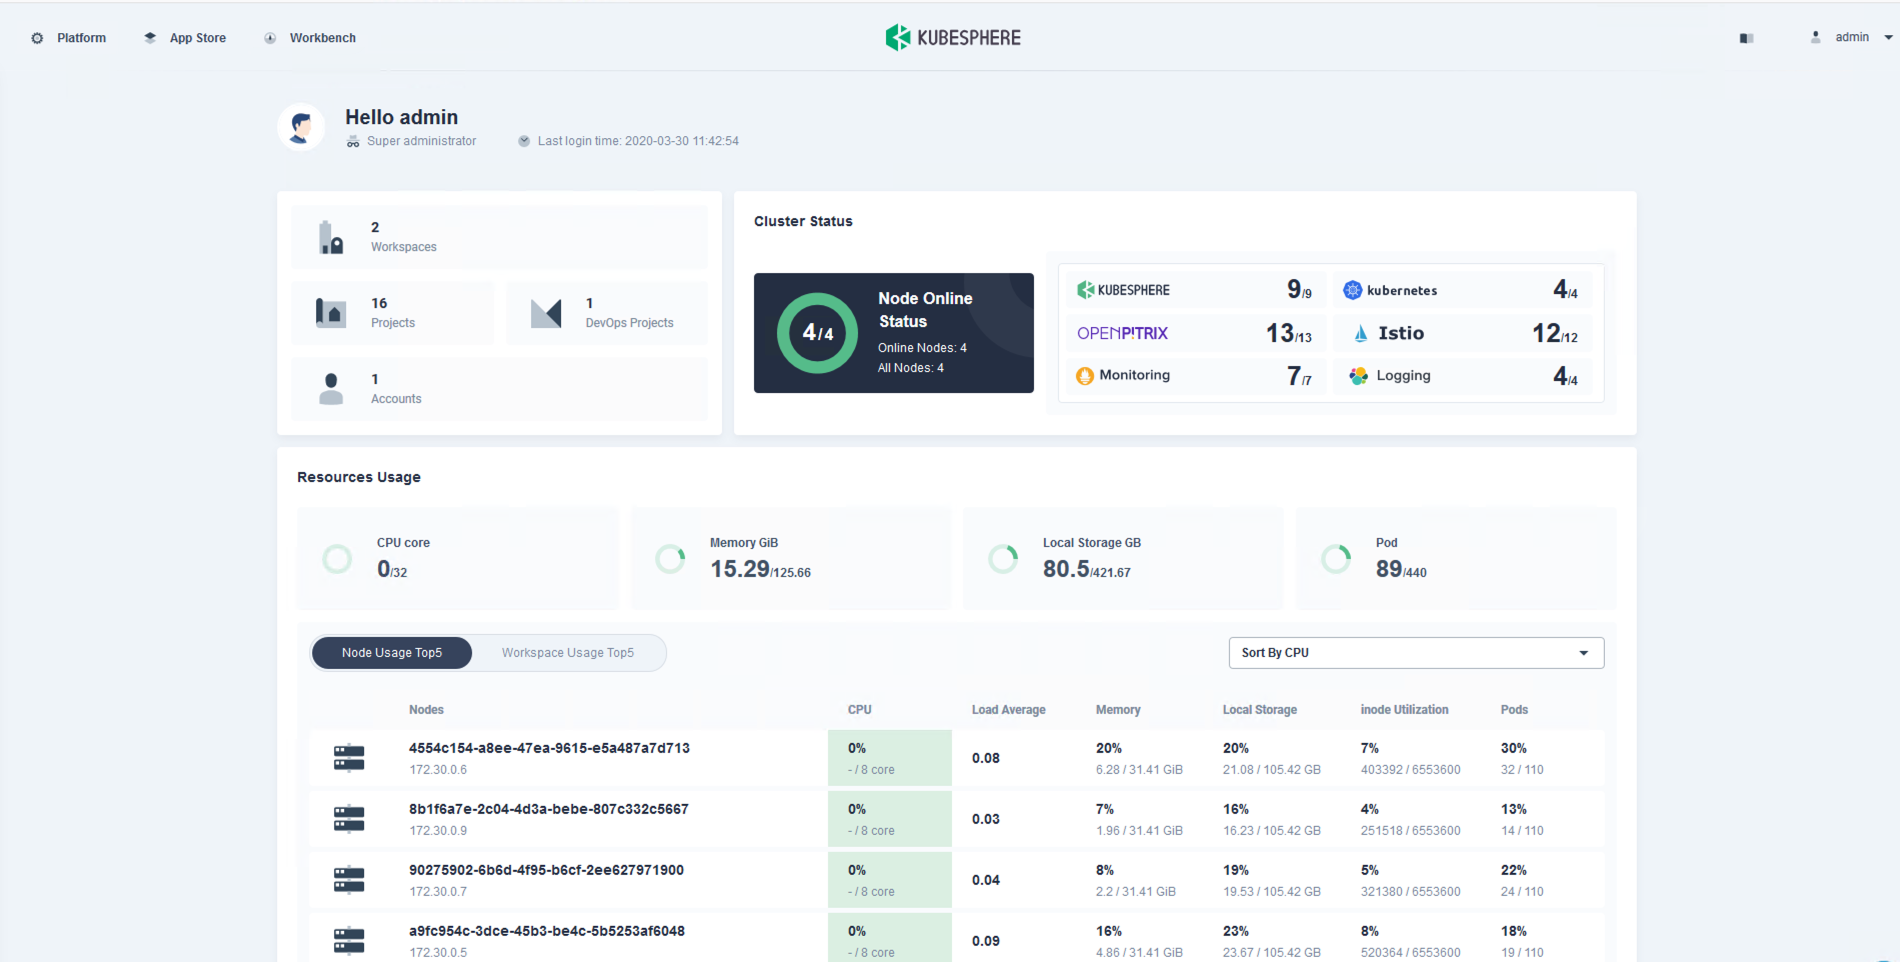
node-exporter 정상 기동 후에 CPU / Memroy / Load 가 정상적으로 표시됨
Deploy Sample Application
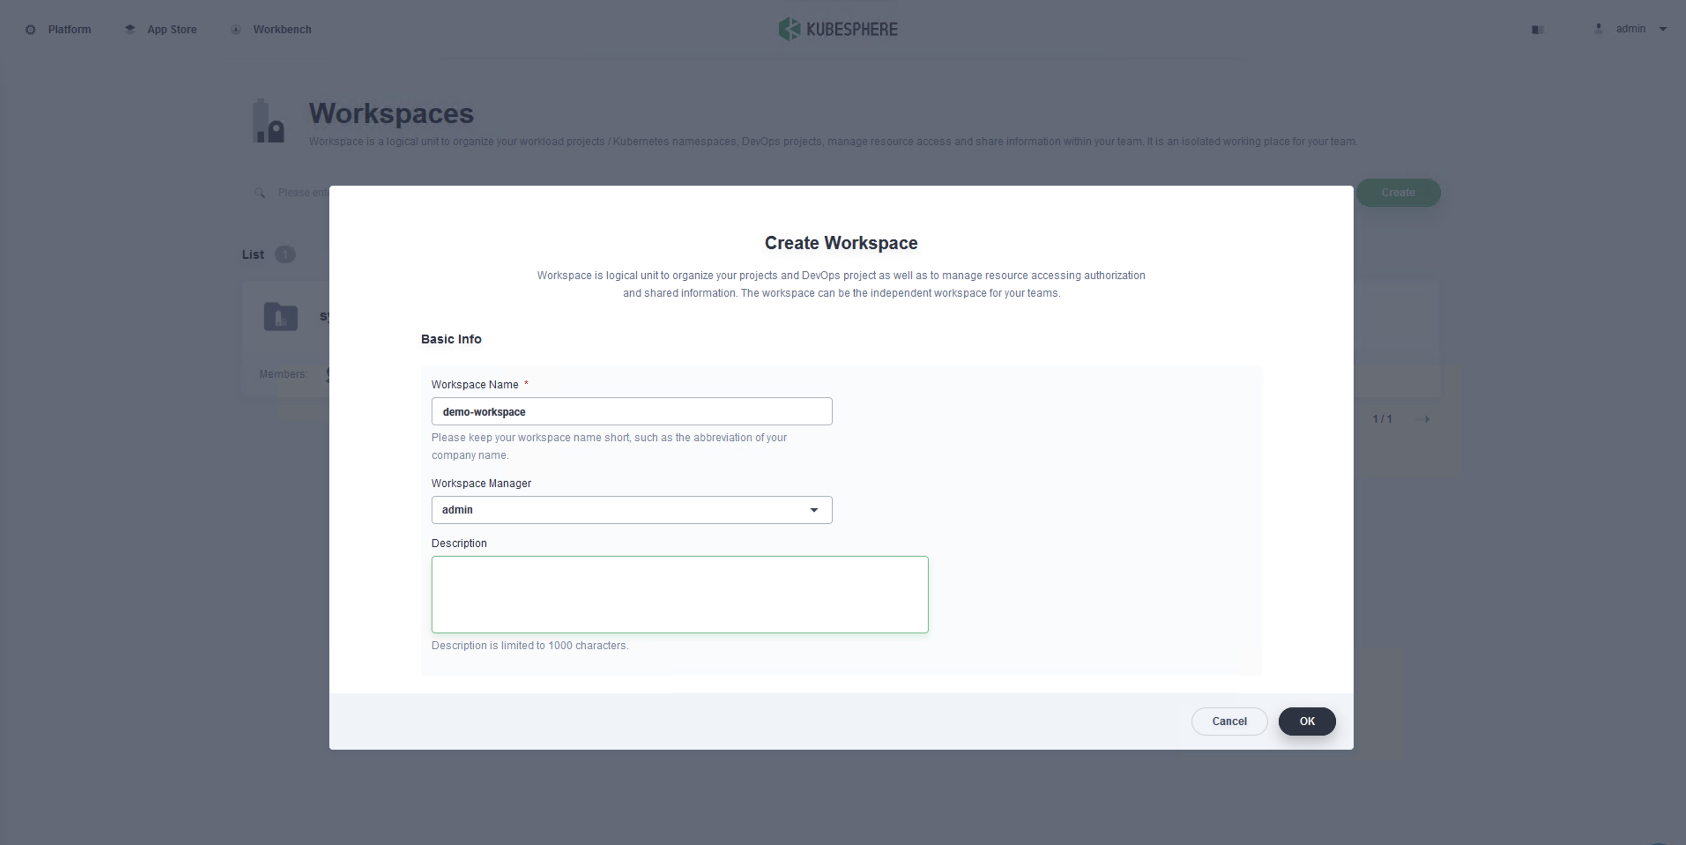
Create Workspace / Project
workspace 생성
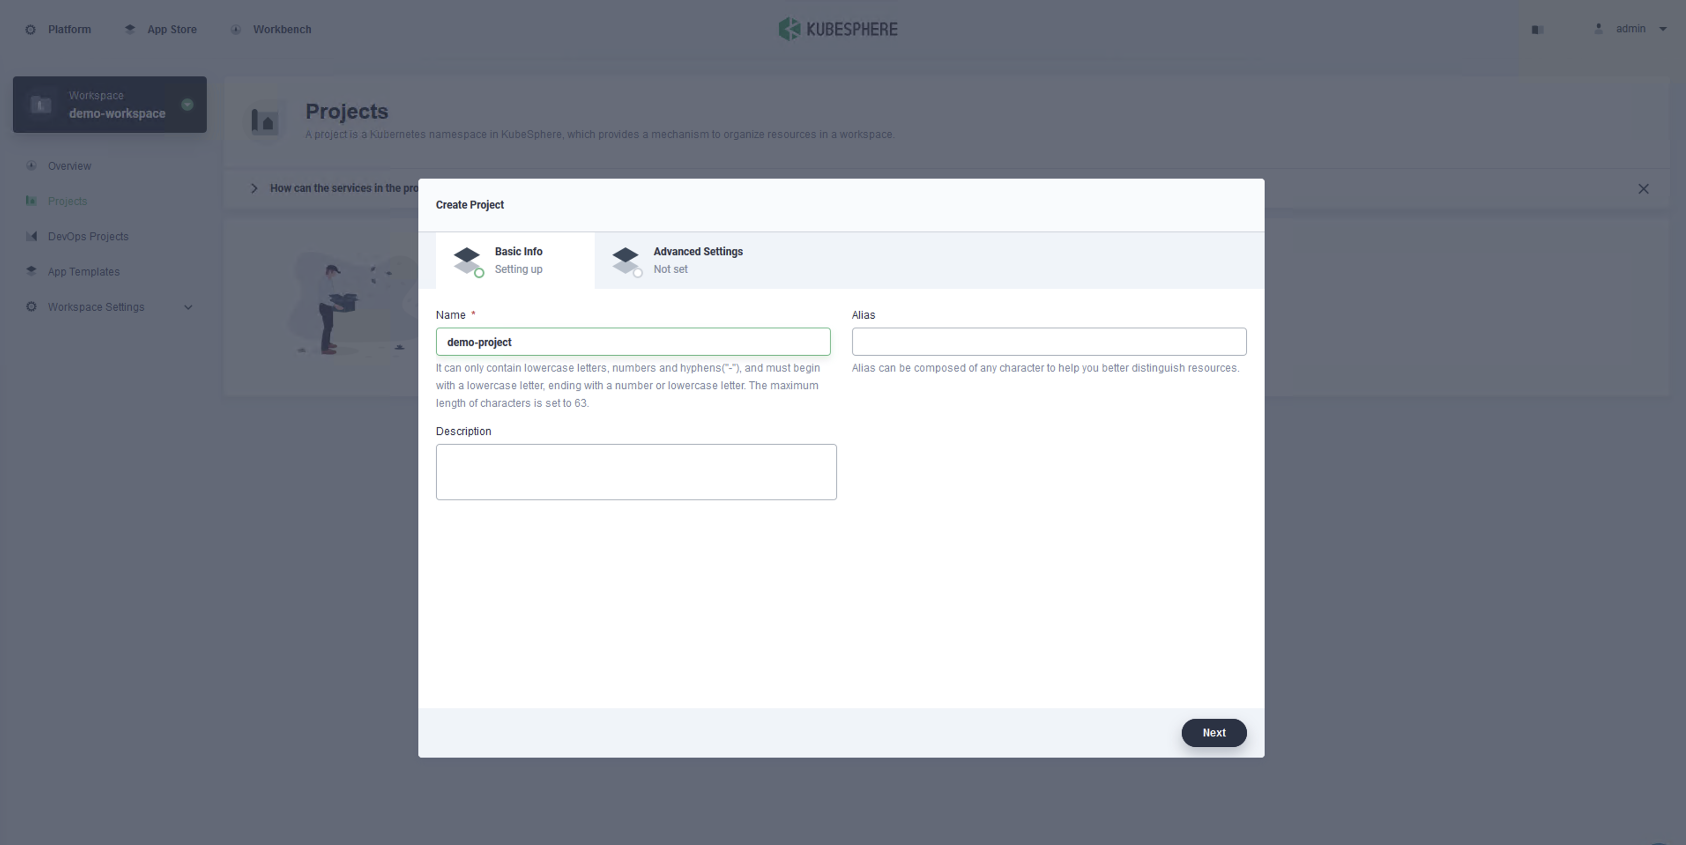
project 생성
project는 쿠버네티스의 네임스페이스로 생성된다.
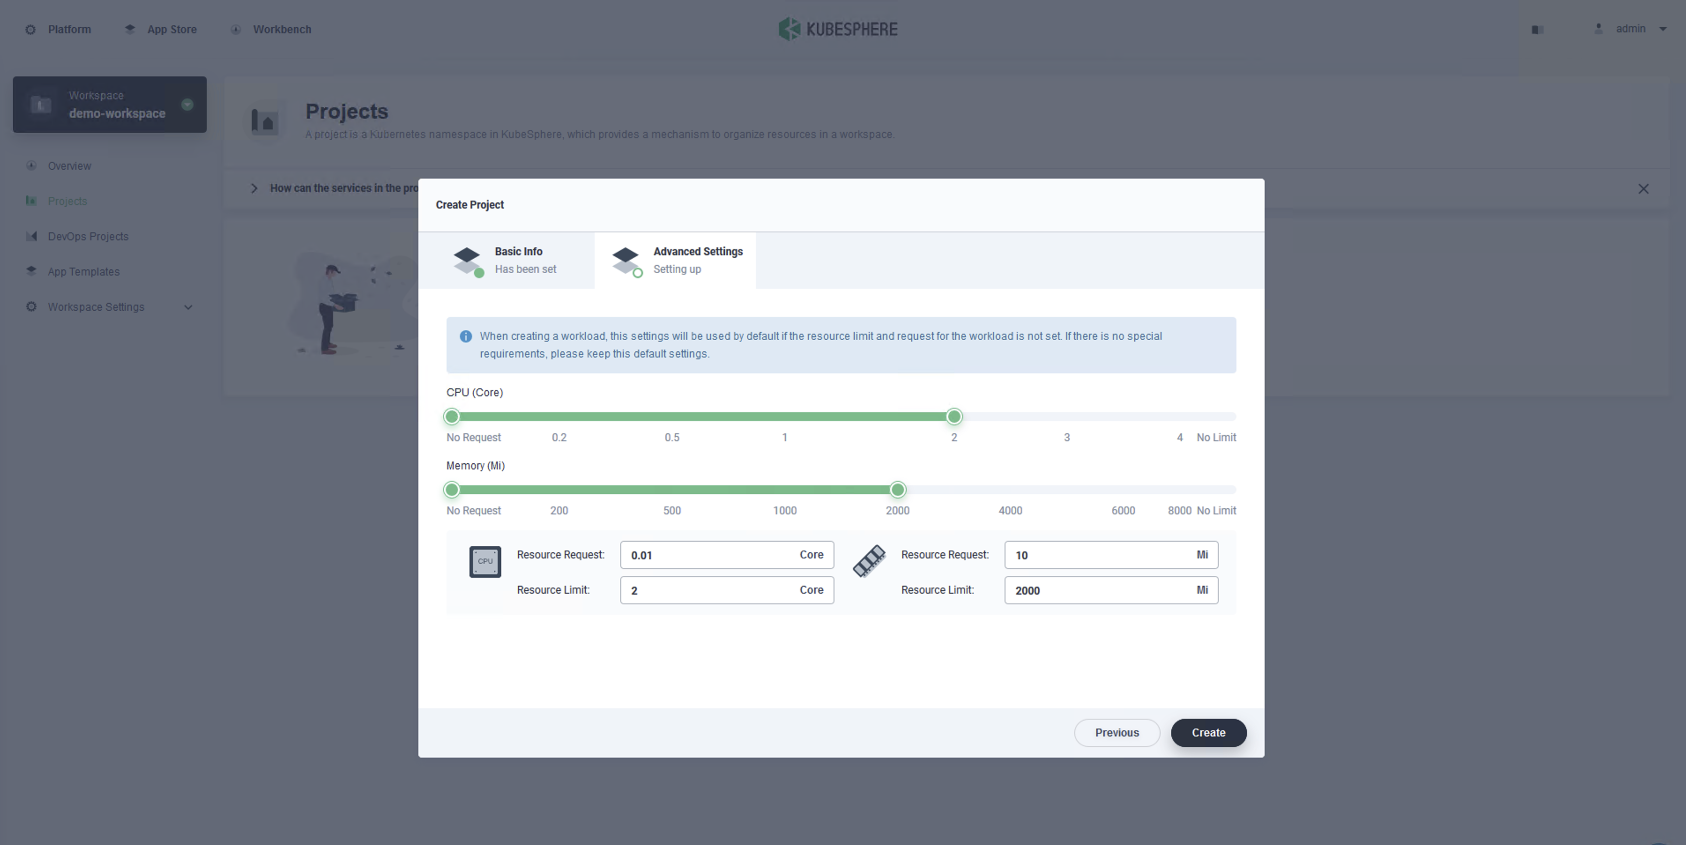
네임스페이스의 리소스 쿼터를 지정한다.
Nginx Web Application
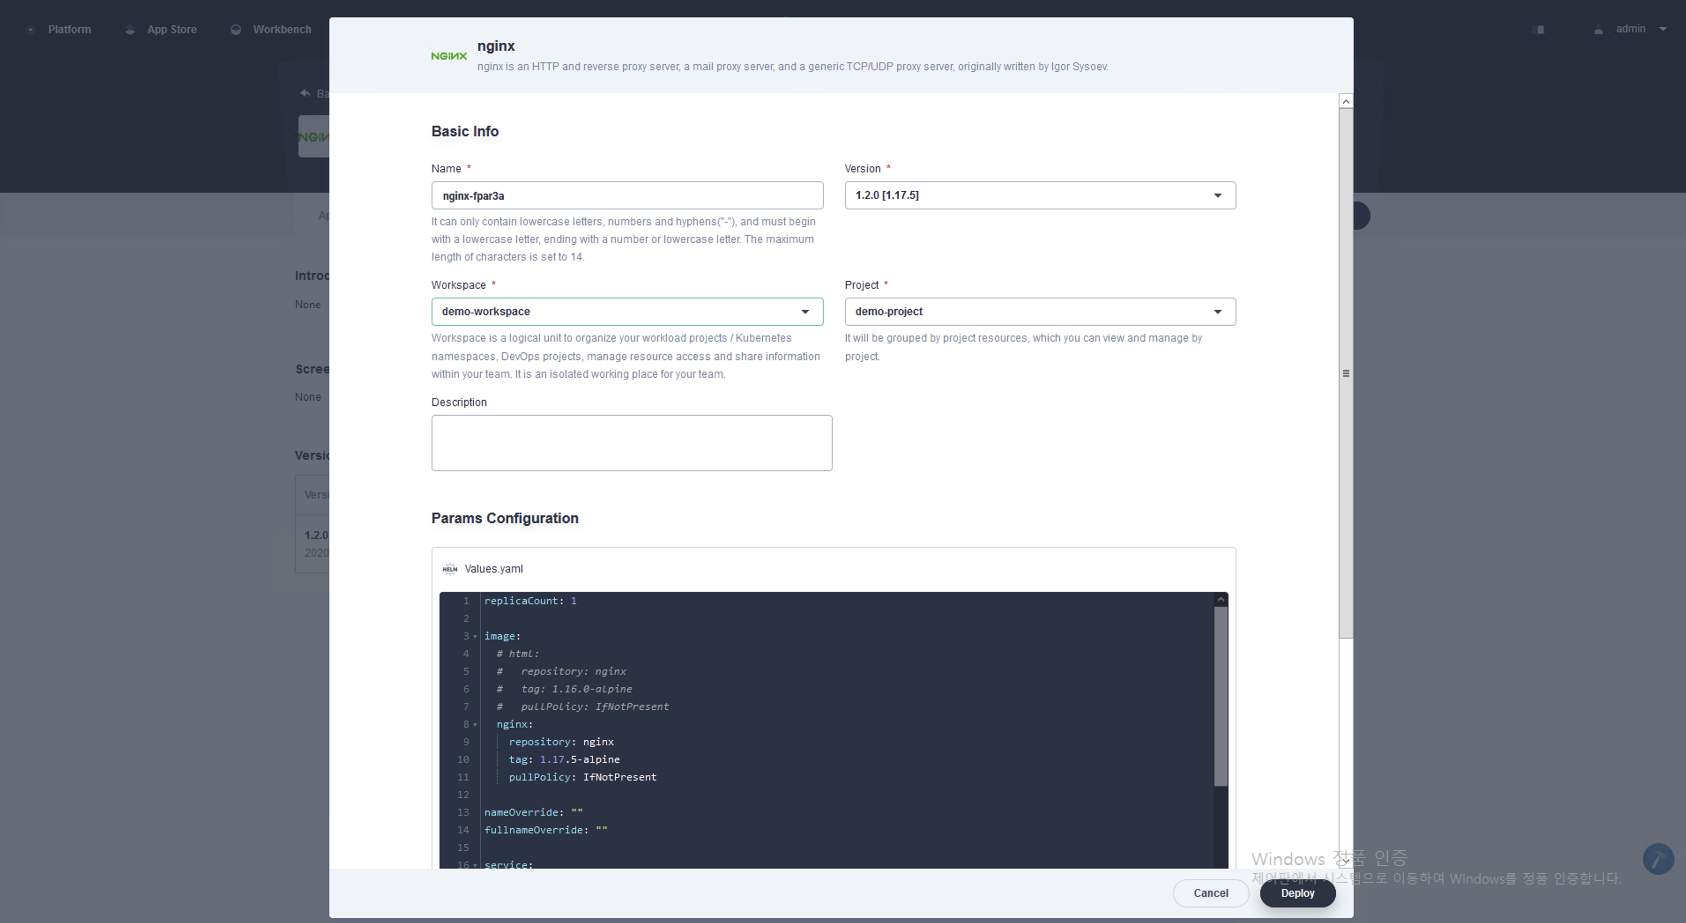
kubesphere > App Store > Nginx > Deploy
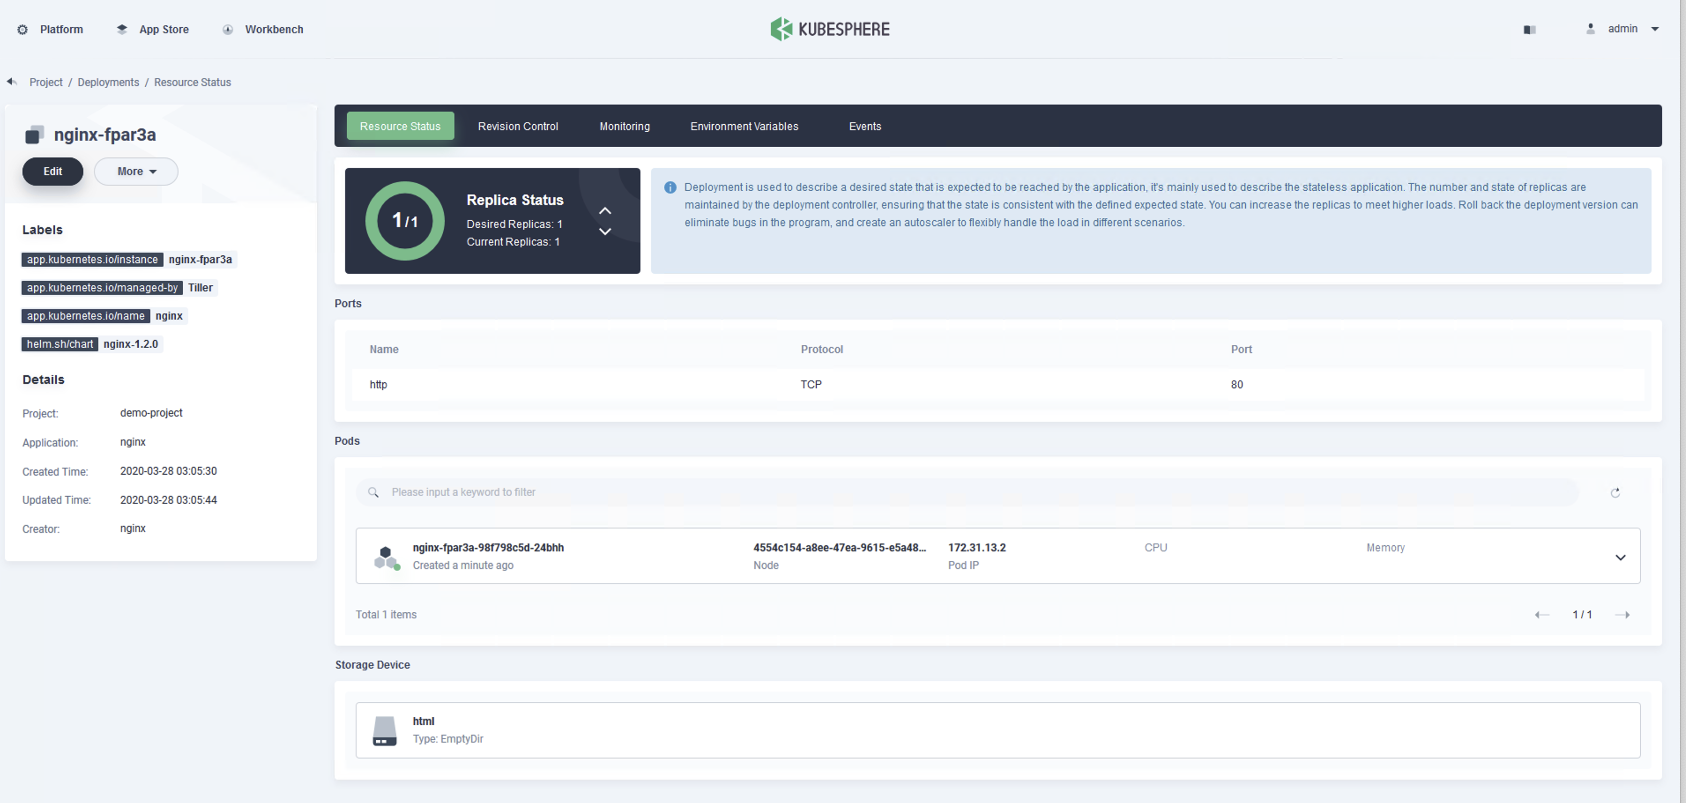
디플로이먼트 확인
서비스 확인
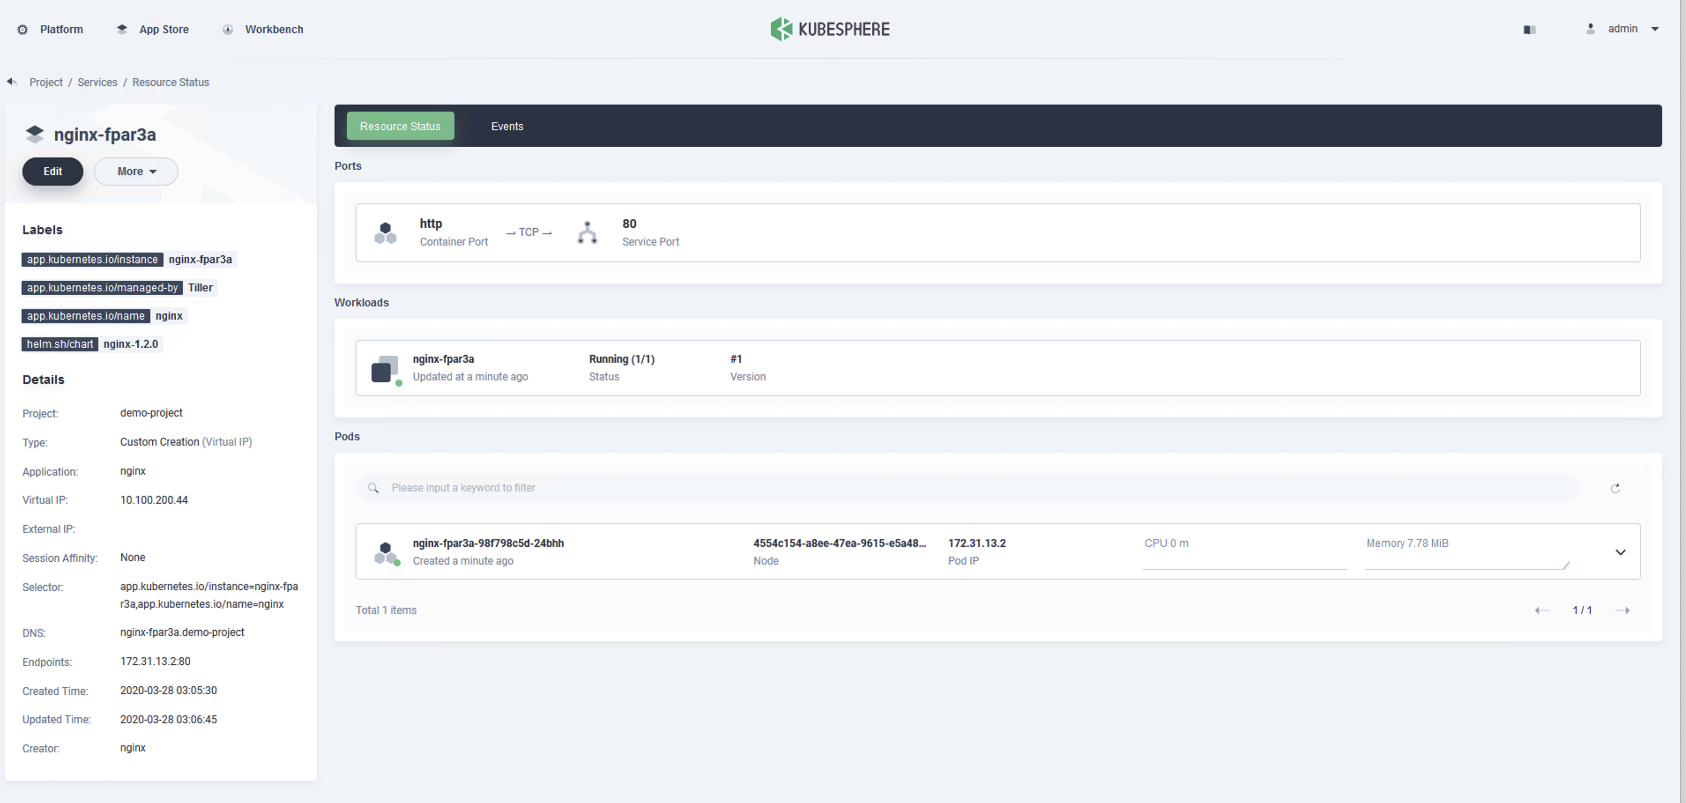
웹 브라우저 확인
 ** 파드 IP가 NSX-T에서 Routable 로 설정되어 있어서 Windows Jumpbox 에서 바로 엑세스가 가능하다. Routable 이 아닌경우 서비스를 NodePort / LoadBalancer / Ingress 가 필요하다 **
GitLab CE
VCS 로 git server를 설치한다.
helm install --name gitlab --namespace git stable/gitlab-ce --set externalUrl=http://git.k8s.kdis.local,gitlabRootPassword=VMware1!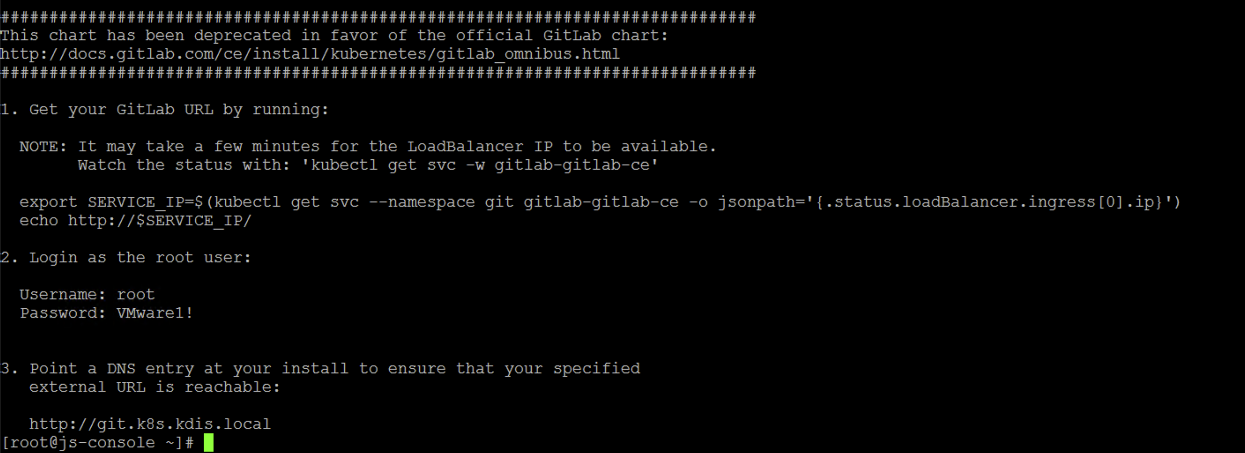
gitlab running 확인

dns setting helm 설치시 설정으로 external URL을 git.k8s.kdis.local 로 했기 때문에, DNS에 LoadBalancer External IP를 지정해 준다.
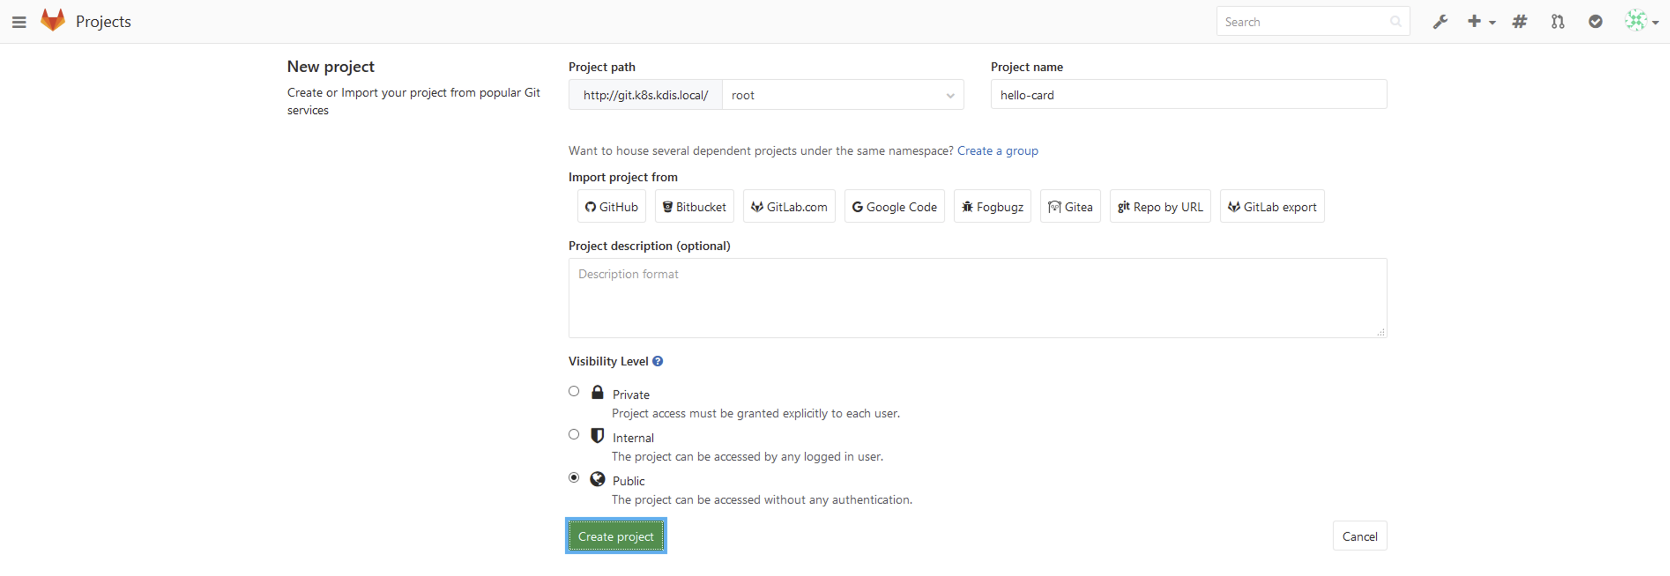
Browser Access 후 Project Git Repo 생성
Create Spring Boot Application and Containerize
start.spring.io 로 sample download
spring init --build gradle --java-version=1.8 --dependencies=web,thymeleaf,actuatoradd WelcomeController to DemoApplication.java
@Controller
class WelcomeController {
  @GetMapping("/")
  public String main(Model model)	{
    return "welcome";
  }
}
add welcome.html to resources/templates folder
<body bgcolor="lightgreen">
<h1>
    Hello World
</h1>
</body>
Run Sample Application
./gradlew bootRunPush to Git Repo 윈도우즈에 git 에 설치되어 있지 않은 경우, git 을 다운로드해서 설치한다.
Containerize with Docker and DockerfileContainerize with Jib
- build.gradle > plugins 에 아래 추가
plugins { id("com.google.cloud.tools.jib") version "2.1.0" }- Jib 설정 추가
jib {
  to {
    //image="10.195.70.131:443/biz-a-team/simple-app"
    image="jhwangdemo/simple-app"
    auth {
      username="jhwangdemo"
      password="P@ssw0rd1234"
    }
    tags=["blue", "0.0.1"]
  }
  from {
    image="openjdk:8-alpine"
  }
  allowInsecureRegistries(true)
}
CI 파이프라인을 윈한 Jenkinsfile 예제
pipeline {
  agent any
  stages {
    stage('Prepare') {
      steps {
        parallel (
          'gradle clean': {
            gradlew 'clean'
          },
          'kubectl cli': {
            sh 'curl -LO https://storage.googleapis.com/kubernetes-release/release/$(curl -s https://storage.googleapis.com/kubernetes-release/release/stable.txt)/bin/linux/amd64/kubectl'
            sh 'chmod a+x kubectl'
          }
        )
      }
    }
    stage('Build & Docker') {
      steps {
        gradlew 'jib'
      }
    }
    stage("Deploy") {
        steps {
          withKubeConfig([ credentialsId: 'pez-205-k8s', serverUrl: 'https://k8s.run.haas-205.pez.pivotal.io:8443' ]) {
            sh './kubectl apply -f manifest/simple-app.yaml'
          }
        }
    }
  }

  post {
    always {
      deleteDir()
    }
  }
}

def gradlew(command)  {
  sh "./gradlew ${command} --stacktrace"
}
- Revision Control
특정 버전의 ReplicaSet으로 돌아가기 위해서 사용한다
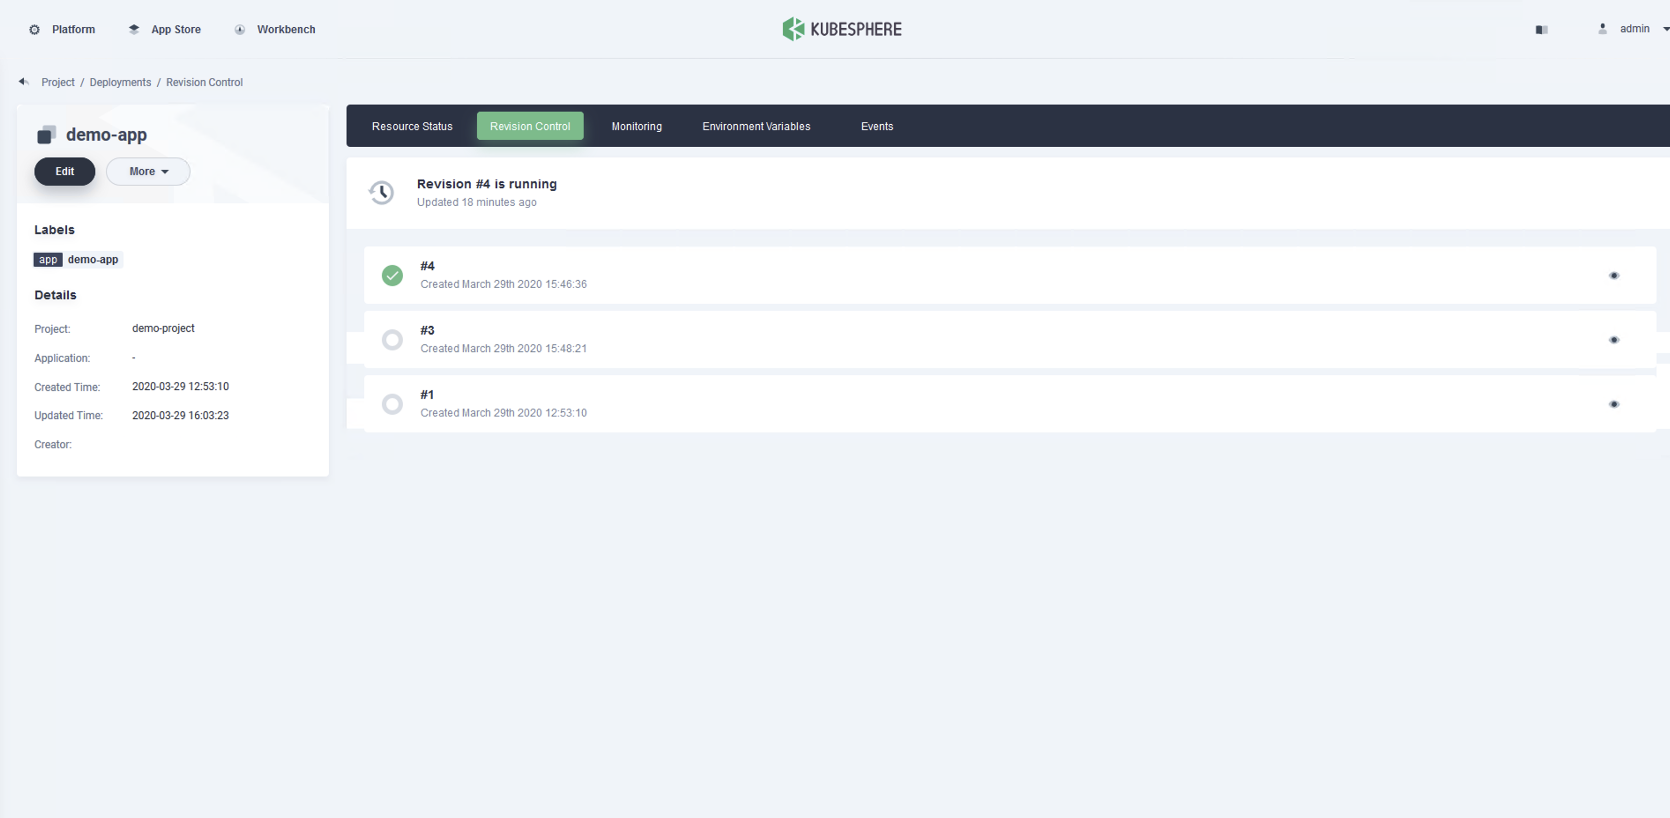
kubesphere 에서 버그인지 “NotFound the server could not find the requested resource” 에러가 발생한다. 확인필요
레플리카셋 확인
kubectl get rs -n demo-project -o wide롤아웃 히스토리
kubectl rollout history -n demo-project deploy/demo-app
특정버전의 롤아웃 히스토리
kubectl rollout history -n demo-project deploy/demo-app --revision 3특정 버전으로 롤아웃
kubectl rollout undo -n demo-project deploy/demo-app --to-revision 2
Jenkins
Jenkins 는 NodePort 30180으로 기동한다. 관리자 Passowrd는 kubesphere 와 동일하다
jenkins 에서 외부 사이트를 접속할 수 없는 문제가 있어서, DNS 에 전달자(Forward)를 추가(8.8.8.8)한다.
Service Mesh
ks-installer 에서 ServiceMesh 가 enable 이 되어야 한다.
Gatway 세팅 project > project settings > Advacned Settings 에서
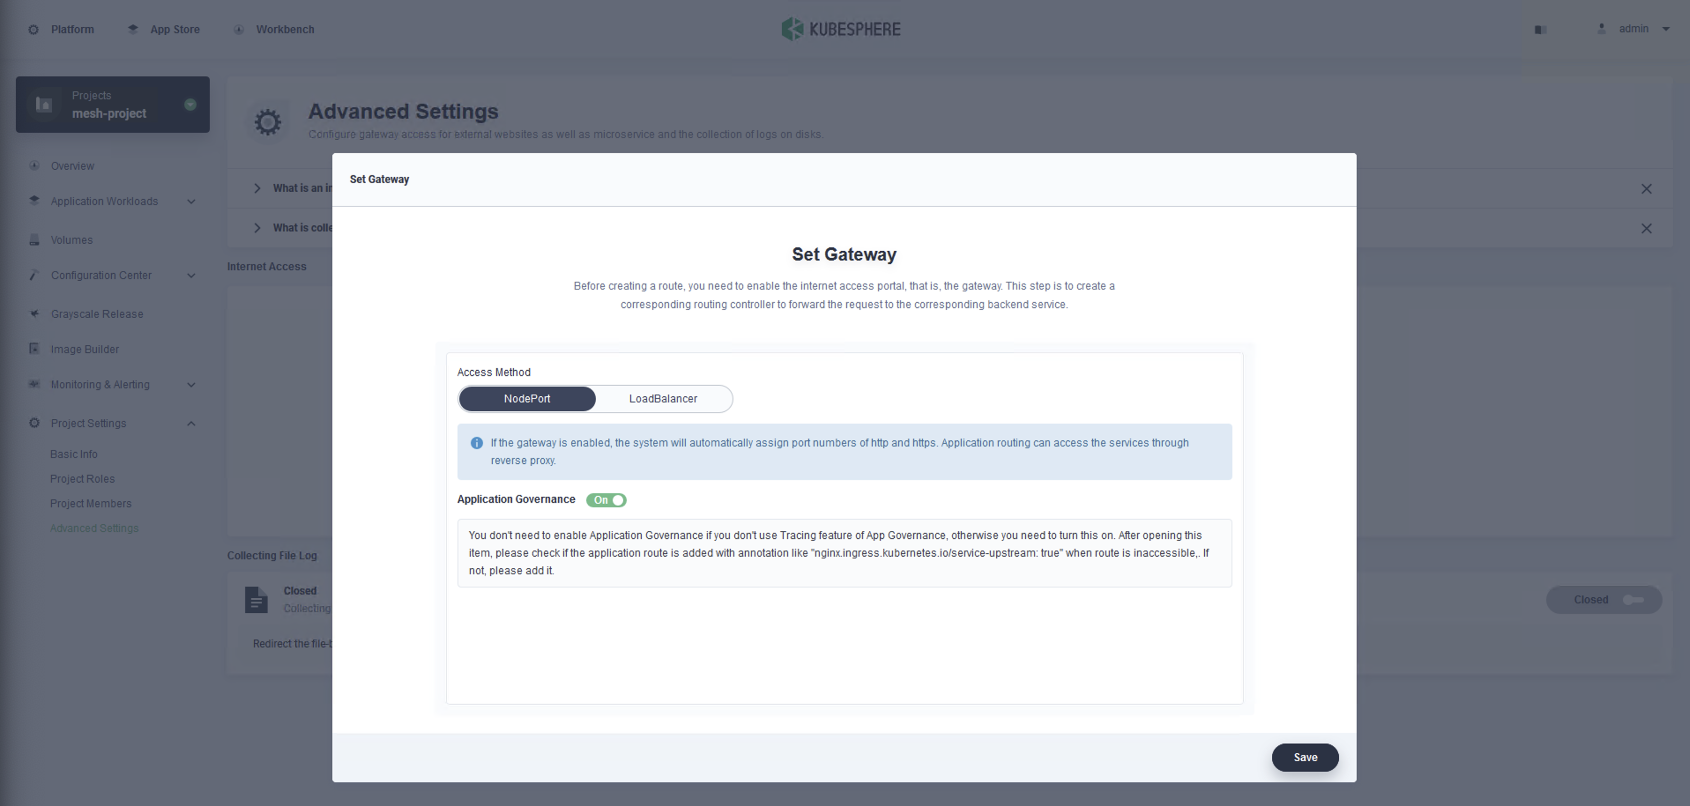 Application Governance 를 Enable 한다
Deploy Istio BookInfo Sample Application Project > Application Workloads > Applications 에서 Deploy Sample Application 선택
http://productpage.mesh-project.10.50.50.21.nip.io/productpage?u=normal
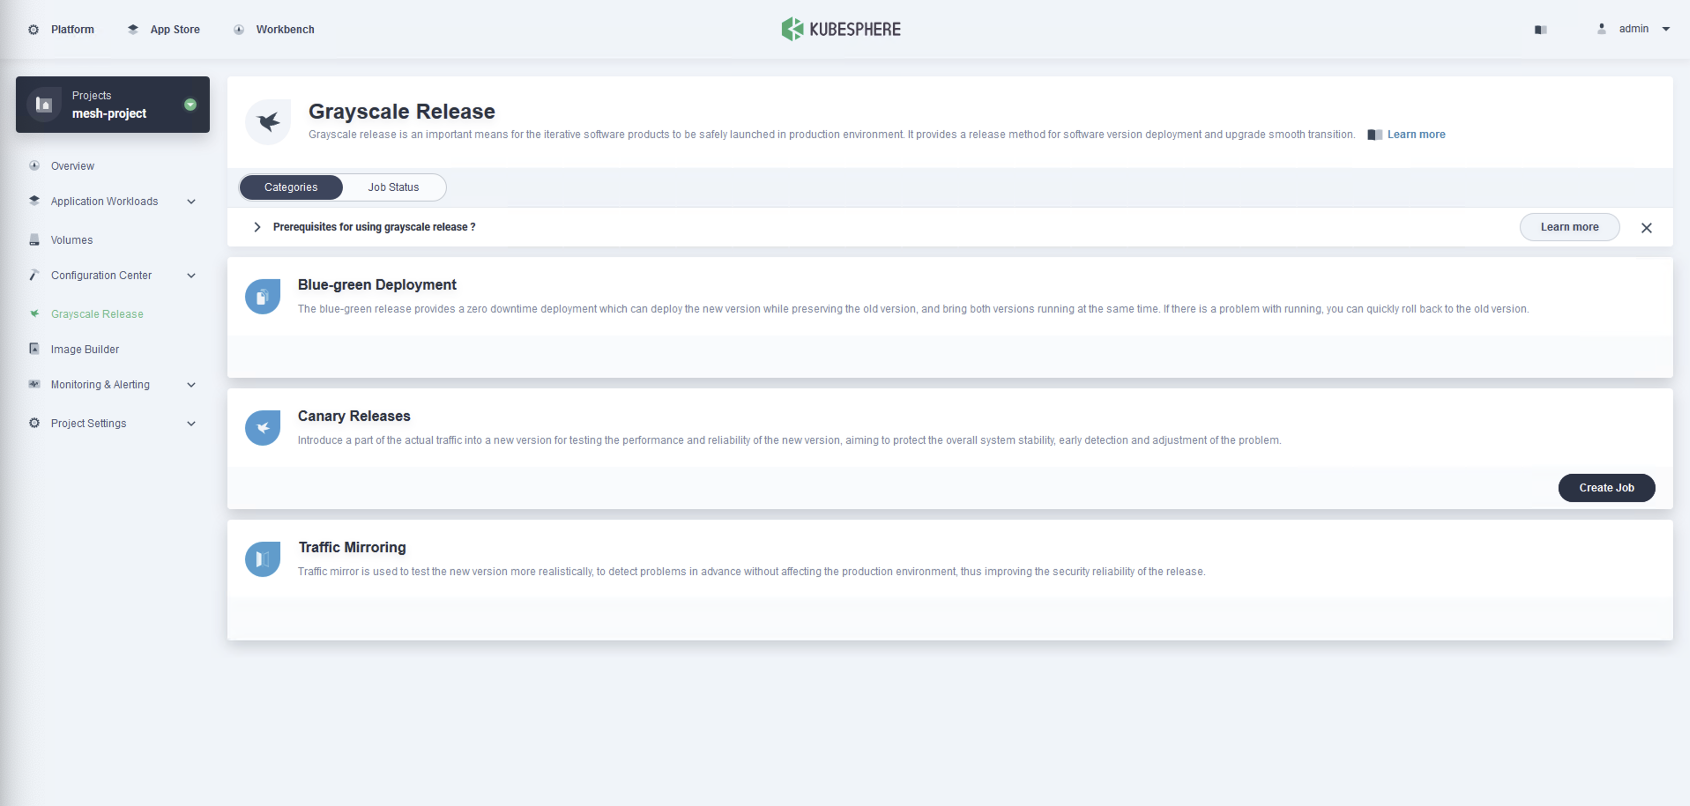
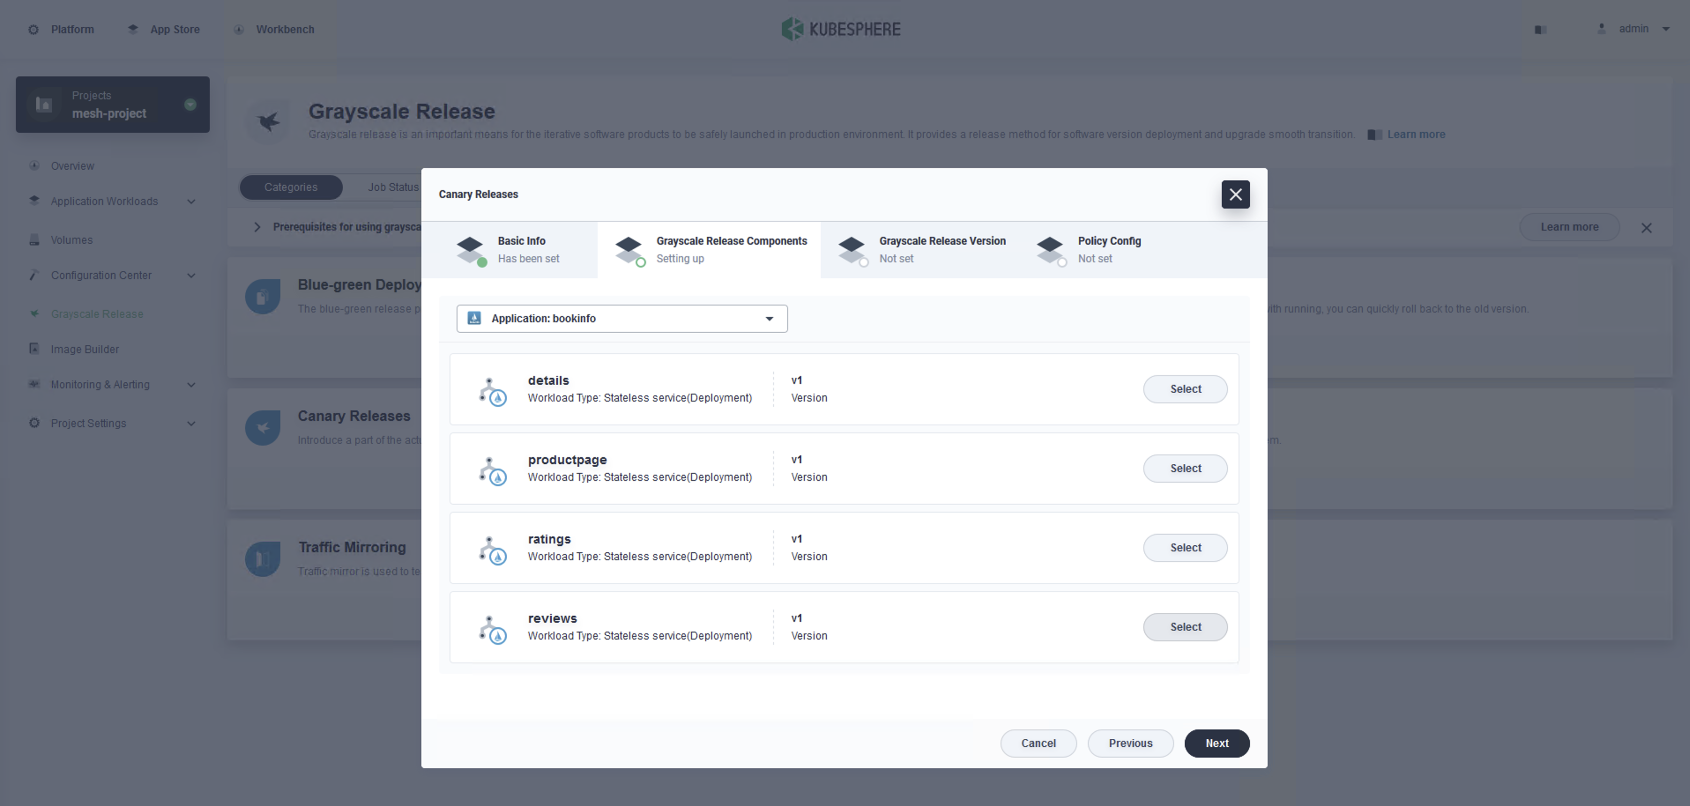
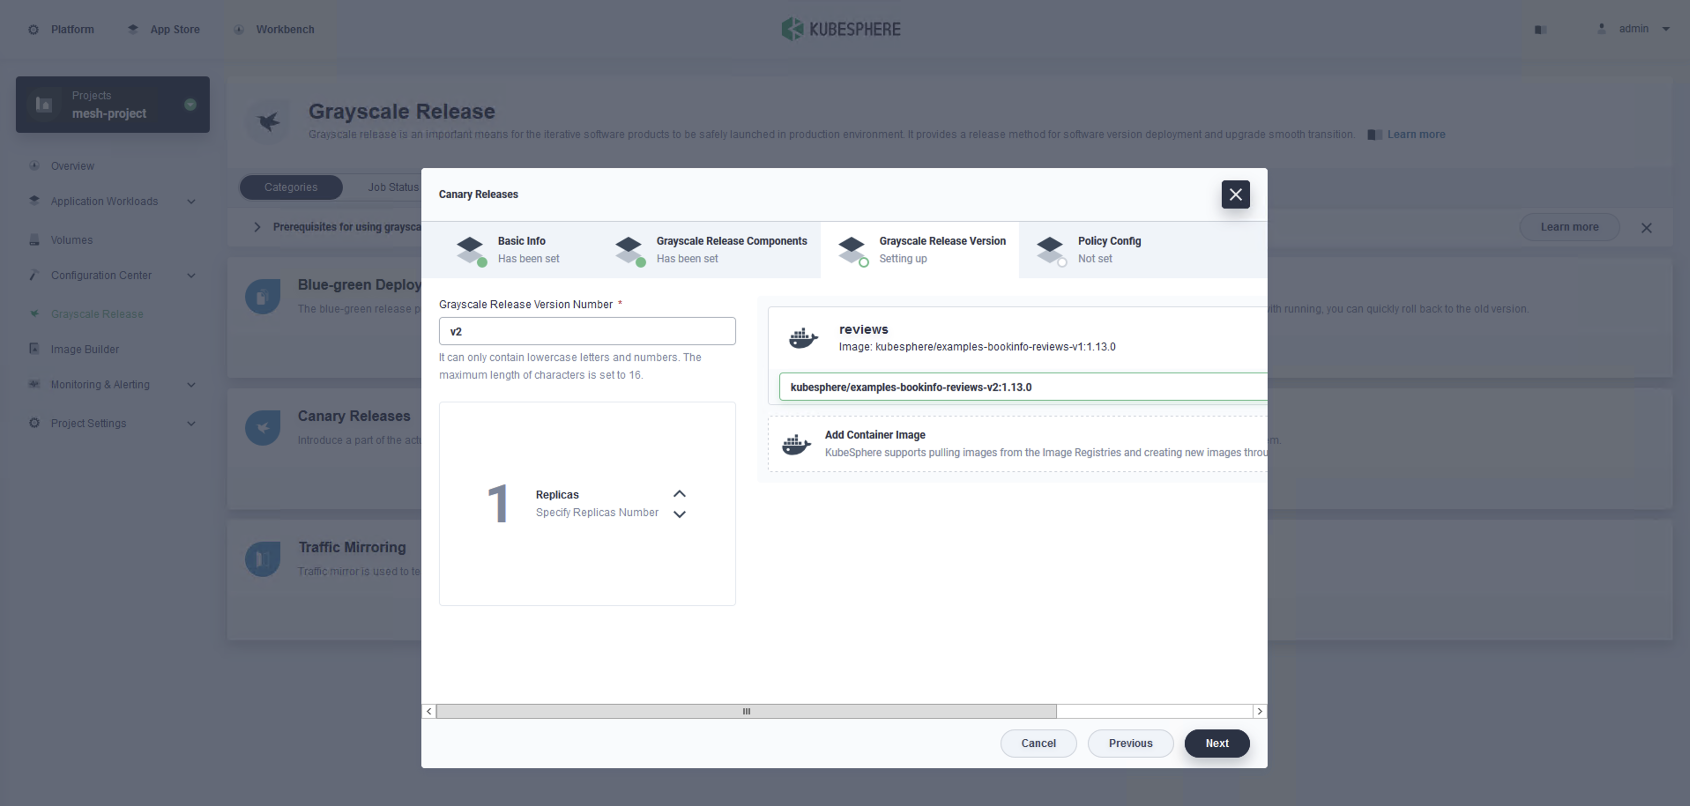
Canary Release
- Create Job for Grayscale Release
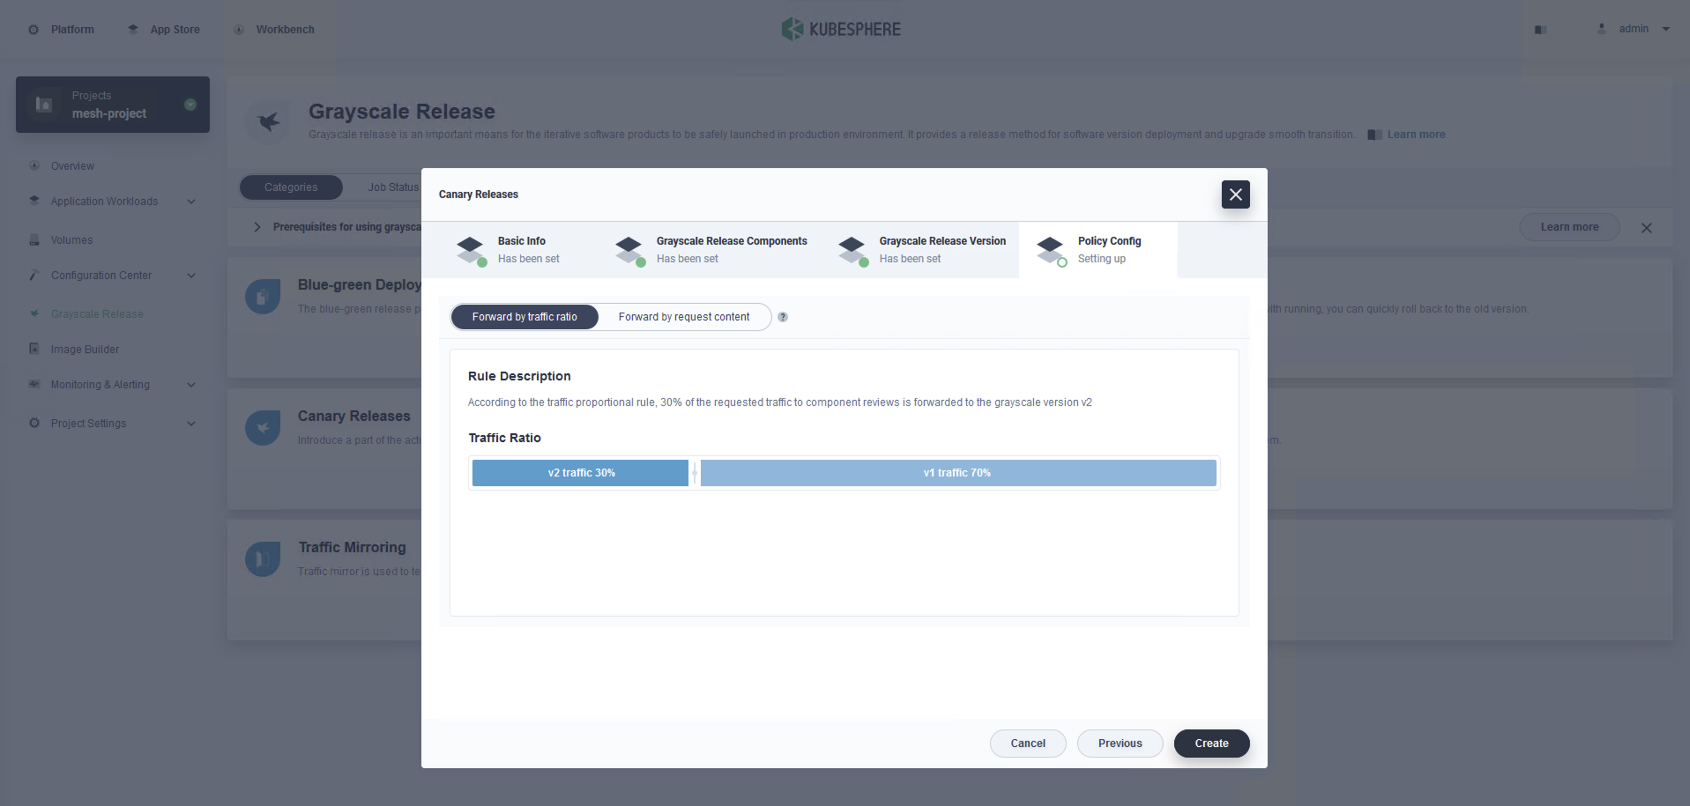
- Grayscale Job 확인
- Create Job for Grayscale Release
Traffic Management
- Project > Application Workloads > Applications > Composing App > Bookinfo
- Tab 에서 Traffic Management 선택
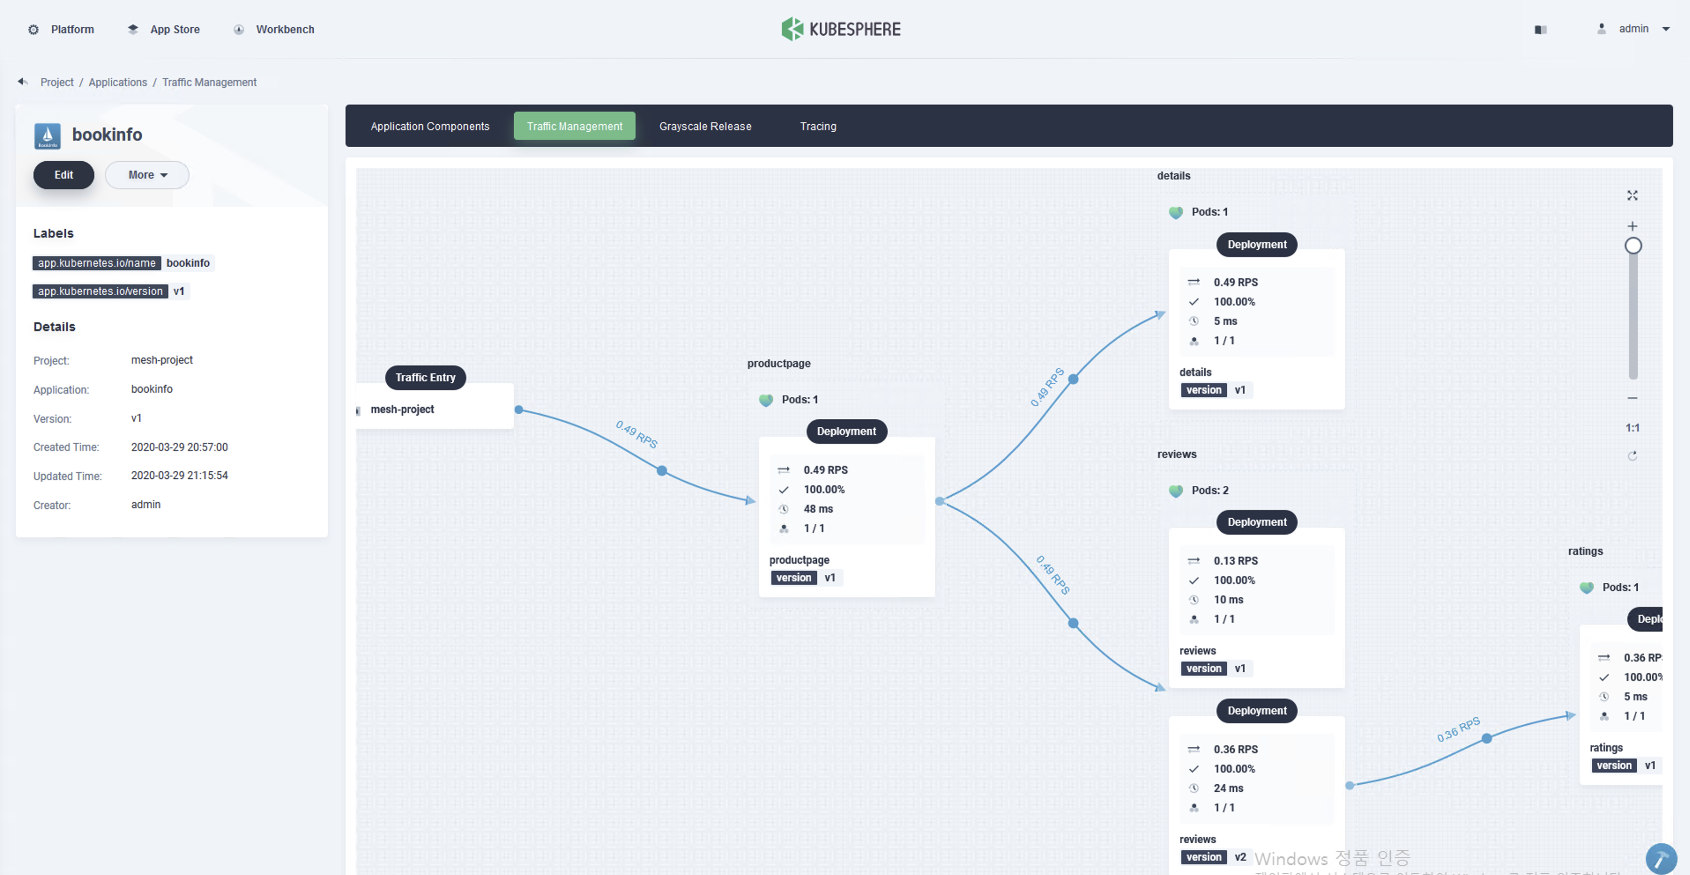
- Tab 에서 Traffic Management 선택
- Project > Application Workloads > Applications > Composing App > Bookinfo
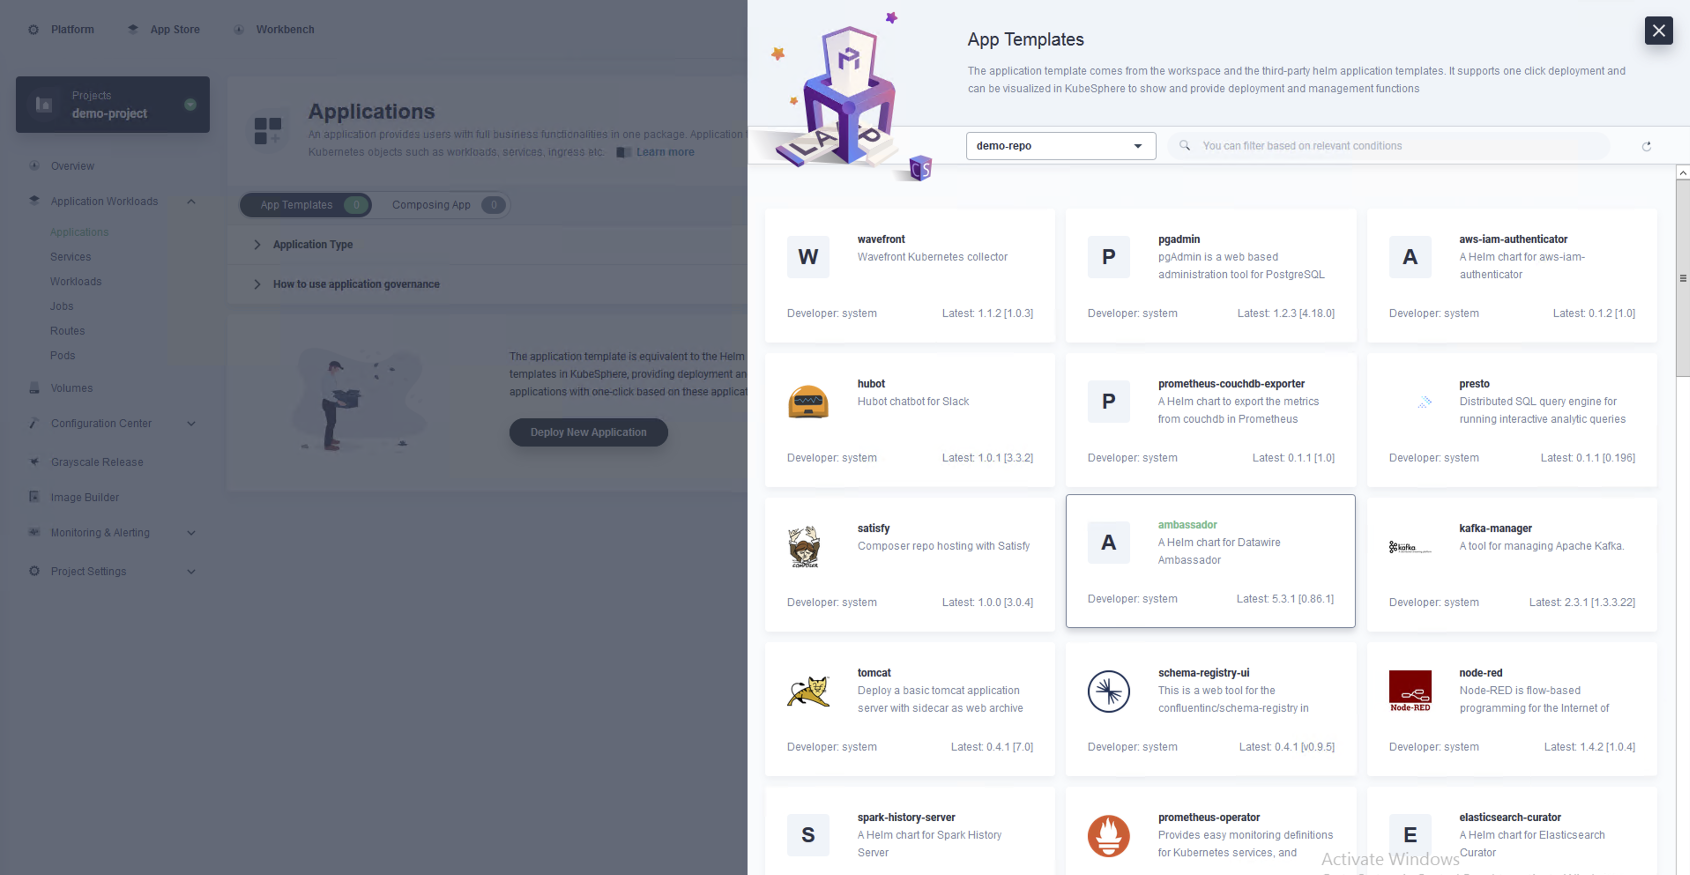
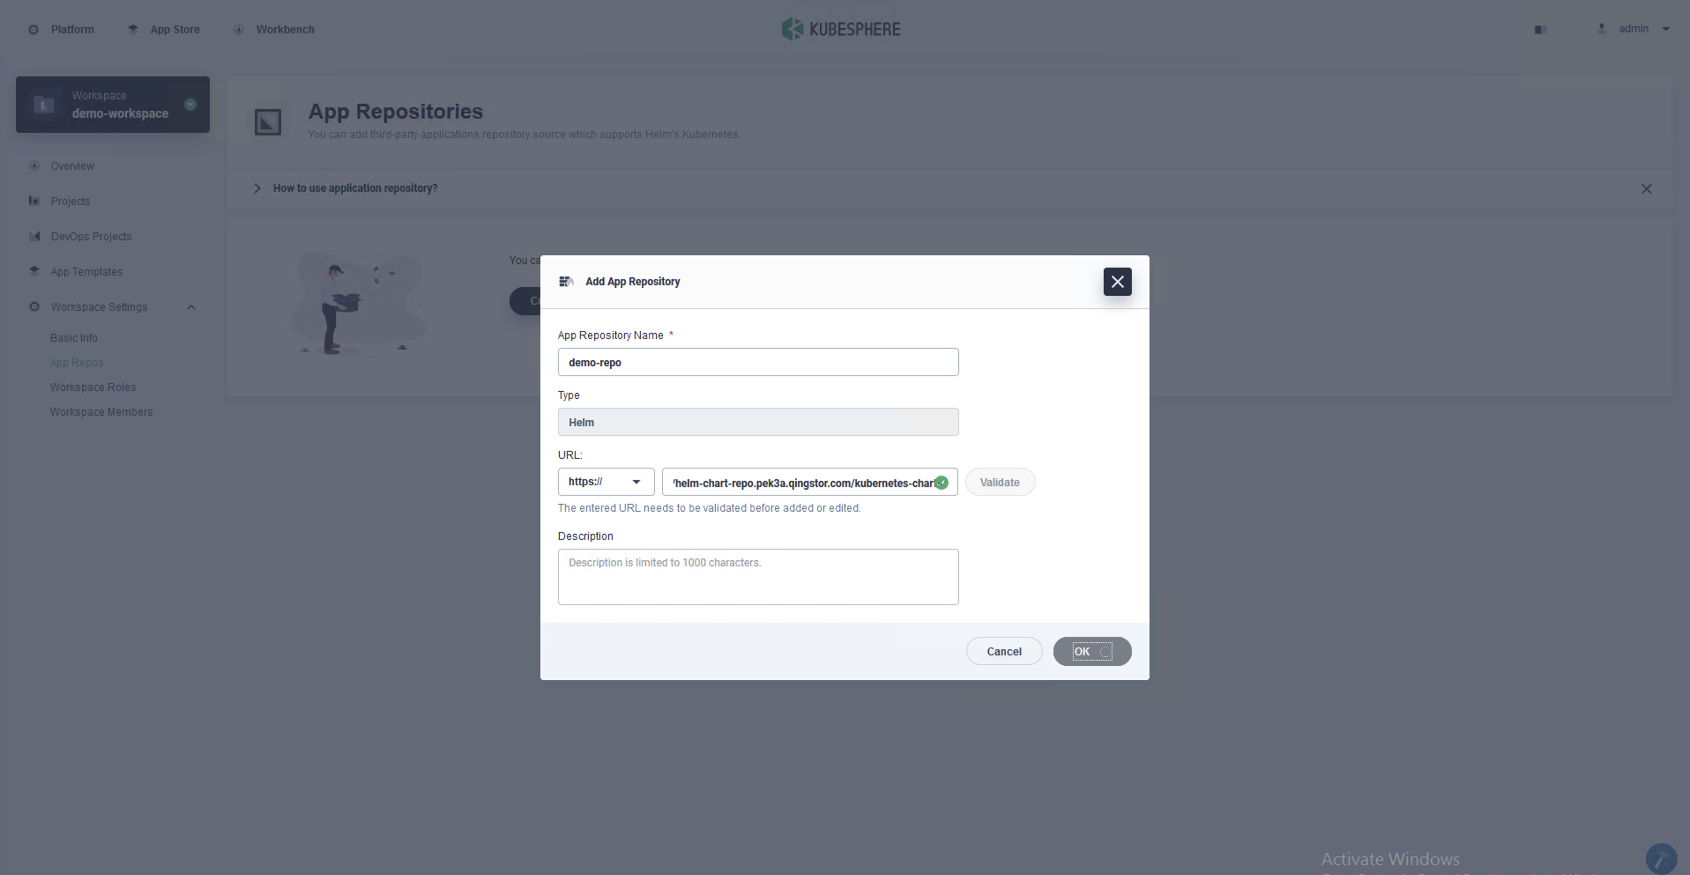
App Store
Add App Repos Workspace > Workspace Settings > App Repos > Create Repo
새로운 Helm Repo 추가
Browse App Templates Project > Application Workloads > Applications > Deploy New Application > App Tempates